
Key Takeaways:
This guide provides a comprehensive exploration of creating professional-grade personalized ceramic mugs. It moves beyond a simple tutorial to examine the foundational science of sublimation, offering a detailed 7-step process that covers everything from initial design conception to scaling up for a business. You will learn the critical differences between sublimation and other personalization methods, understand the necessity of specialized equipment and materials, and gain the knowledge to troubleshoot common issues. The article emphasizes that the quality of the final product is inextricably linked to the quality of the blank mug itself, highlighting the benefits of partnering with an experienced, factory-direct manufacturer for consistency and excellence. Ultimately, this piece serves as a masterclass for both hobbyists seeking perfection and entrepreneurs looking to build a reliable business around personalized ceramic coffee mugs.
Table of Contents
- The Foundational Science: Why Sublimation Transforms Ceramic Mugs
- Comparing Mug Personalization Methods: A Head-to-Head Analysis
- The Essential Toolkit: Assembling Your Sublimation Arsenal
- Common Pitfalls and How to Avoid Them: A Sublimation Troubleshooting Guide
- The 7-Step Process to Flawless Personalized Ceramic Coffee Mugs
- Step 1: The Conceptual Heart – Designing Your Masterpiece
- Step 2: The Digital Translation – Printing Your Design
- Step 3: The Preparation Ritual – Getting the Mug Ready
- Step 4: The Alchemical Transformation – The Heat Press Process
- Step 5: The Grand Reveal and Cooling
- Step 6: Quality Control and Refinement
- Step 7: Beyond the Single Mug – Scaling Up and Business Considerations
- Advanced Techniques and Creative Horizons
- The Human Element: The Enduring Appeal of a Personalized Gift
- Frequently Asked Questions (FAQ)
- References
The Foundational Science: Why Sublimation Transforms Ceramic Mugs
Before one can truly master the art of creating a beautiful personalized ceramic mug, it is imperative to develop an intimate understanding of the process that makes it possible. We are not merely sticking an image onto a surface; we are, in a very real sense, infusing the image into the very being of the mug. The method, known as dye-sublimation, is a fascinating interplay of physics and chemistry that elevates a simple ceramic vessel into a durable and vibrant canvas. The term ‘sublimation’ itself describes a phase transition where a substance moves directly from a solid to a gas state, completely bypassing the liquid phase. Think of dry ice. When you see the thick fog rolling off a block of it, you are not witnessing melting; you are witnessing sublimation as the solid carbon dioxide turns directly into a gas. This is precisely what happens to the special inks we use in this process.
These are not ordinary inks. Sublimation inks are composed of solid dye particles suspended in a liquid carrier. When printed onto a specialized transfer paper, the ink sits on the surface, waiting for its transformation. The magic happens when heat and pressure are introduced. When a mug, coated with a specific polymer, is placed in a heat press with the transfer paper wrapped tightly around it, the heat causes two critical things to occur simultaneously. First, the solid dye particles in the ink transform into a gas. Second, the heat causes the pores of the mug’s polymer coating to open up. This receptive state of the polymer is the key. The gaseous dye, now free to move, is drawn into these open pores by the pressure. As the process completes and the mug begins to cool, the pores of the polymer coating close, permanently trapping the dye particles within the surface of the mug. The image is not sitting on top of the coating; it has become a part of it. This is a fundamental distinction that separates sublimation from nearly all other forms of personalization.
The profound implication of this infusion is durability. A properly sublimated design will not peel, crack, or fade under normal use. It can withstand the rigors of a dishwasher and the heat of a microwave because the image is protected by the same tough polymer layer that gives the mug its glossy finish. Contrast this with a vinyl decal, which is an adhesive layer applied to the surface, vulnerable to peeling at the edges over time, or with certain ceramic paints that can chip or wear away. The sublimation process yields a professional, retail-quality finish that feels smooth to the touch, with the image completely integrated into the surface. However, this entire elegant process is predicated on the quality and consistency of the polymer coating. An uneven or low-quality coating will result in a blotchy, faded, or incomplete transfer. The pores may not open uniformly, or the layer might be too thin to properly absorb the dye. Therefore, the selection of your blank personalized ceramic cups is not a preliminary step but a foundational choice that dictates the potential for success. A reliable manufacturer with stringent quality control over their coating process, like our own decade-long experience at Zibo TopSub, ensures that every single mug provides a perfect, receptive canvas for your creative expression. The science is elegant, but it demands a worthy medium to truly flourish.
Comparing Mug Personalization Methods: A Head-to-Head Analysis
To fully appreciate the capabilities of sublimation for creating personalized ceramic coffee mugs, it is useful to situate it within the broader landscape of personalization techniques. Each method possesses its own set of capabilities, limitations, and ideal applications. Understanding these differences allows a creator or an entrepreneur to make an informed decision based on their specific goals, whether they prioritize permanence, image complexity, production volume, or cost-effectiveness. The following table provides a comparative analysis, examining the most common methods through the lenses of durability, visual quality, and practical considerations. This examination reveals why sublimation holds a distinct and favored position for producing high-quality, long-lasting personalized products.
| Feature | Dye-Sublimation | Adhesive Vinyl Decals | Screen Printing | Ceramic Paints/Markers |
|---|---|---|---|---|
| Durability & Permanence | Extremely high. The image is infused into the polymer coating, making it permanent and resistant to peeling, cracking, or fading. | Low to moderate. The decal is an adhesive layer on the surface that can peel, lift, or be scratched off over time, especially with frequent washing. | Moderate to high. When properly cured, the ink forms a durable layer, but it can still be susceptible to chipping or abrasive wear over a long period. | Low. Typically for decorative purposes only. Not resistant to washing or abrasion unless sealed, and even then, durability is limited. |
| Image Quality & Color | Excellent. Produces vibrant, continuous-tone photographic images with smooth gradients and unlimited colors. The finish is glossy and professional. | Good for solid colors and simple shapes. Complex, multi-colored designs require layering vinyl, which can be bulky. Photographic images are not possible. | Good for bold, solid color graphics. Limited number of colors per design, as each color requires a separate screen. Gradients are difficult to achieve. | Variable. Depends heavily on artistic skill. Colors can be vibrant but achieving professional, clean lines and complex images is very difficult. |
| Dishwasher & Microwave Safe | Yes. The design is protected within the mug’s surface, making it safe for both top-rack dishwashing and microwave use. | No. The heat and water pressure from a dishwasher will cause the adhesive to fail and the vinyl to peel. Not typically microwave safe. | Often, but not always. Depends on the specific ink and curing process used. Some inks may not be microwave safe. Always check manufacturer specifications. | No. The design will wash off almost immediately. Even “bake-on” craft markers are not truly dishwasher safe for regular use. |
| Ideal for Small Batches | Excellent. The setup for a single custom mug is the same as for a dozen, making it perfect for one-of-a-kind gifts and small orders. | Excellent. Very low setup cost for creating one-off designs, making it popular for hobbyists and personal projects. | Poor. The process of creating screens is time-consuming and costly, making it economically unviable for small quantities. | Excellent. The ultimate one-off method, requiring only the markers and the mug. |
| Cost-Effectiveness for Large Batches | Good. While the initial equipment investment is notable, the per-unit cost of ink and paper is low, making it scalable and profitable. | Poor. The process is manual and time-consuming (weeding, transferring), making it inefficient for large-scale production. | Excellent. Once the screens are made, the printing process is very fast, leading to a very low cost per unit for high-volume orders. | Not applicable. This is a purely manual, artistic method not suited for batch production. |
| Required Skill & Complexity | Moderate. Requires understanding of software, printer settings, and the heat press process (time, temperature, pressure). A learning curve exists. | Low to moderate. Requires skill in using a cutting machine and the patience for “weeding” and applying the vinyl without bubbles or wrinkles. | High. Requires significant skill in screen preparation, registration (aligning colors), and the printing technique itself. | Low to high. Basic drawing is easy, but creating a high-quality, artistic piece requires significant talent. |
The Essential Toolkit: Assembling Your Sublimation Arsenal
Embarking on the journey of sublimation printing is akin to an artisan preparing their workshop. The quality of the final creation is not merely a product of skill but is deeply rooted in the quality and appropriateness of the tools employed. Each piece of equipment, each consumable, plays a specific and irreplaceable role in the chemical and physical transformation that occurs. Assembling this toolkit requires a thoughtful consideration of function and purpose, as skimping on a single component can compromise the entire process. This is not about acquiring the most expensive gear, but the right gear that works in harmony to produce consistent, vibrant, and durable personalized ceramic mugs.
The Heart of the Operation: The Sublimation Printer and Inks
At the center of your setup is the sublimation printer. It is a common misconception that any inkjet printer will suffice. This is fundamentally incorrect. A sublimation printer is a specialized device designed to handle sublimation inks, or a standard inkjet printer, such as certain Epson models, that has been specifically converted for this purpose and has never been used with regular ink. These printers, like the popular Sawgrass Virtuoso series, are engineered for the viscosity and particle size of sublimation dyes. The inks themselves are the lifeblood of the process. As discussed, they are not dyes that soak into paper but are solid colorant particles suspended in a liquid. When printed, they sit atop the transfer paper, ready for their gaseous transformation. Using the correct ink and a dedicated printer is non-negotiable for achieving the vibrant, accurate colors that define professional sublimation.
The Messenger: Sublimation Transfer Paper
Equally critical is the paper onto which you print your design. Sublimation paper is not just paper; it is a high-technology medium engineered for a single purpose: to receive the sublimation ink from the printer and then release as much of that ink as possible in gaseous form when heated. A good quality transfer paper has a special coating that holds the ink dots crisply on its surface and prevents them from bleeding, ensuring a sharp image. During the heat press process, it must be able to withstand high temperatures without scorching and efficiently release up to 98% of the ink onto the mug. Using standard copy paper or photo paper will result in disaster; the ink will be absorbed into the paper fibers and will not transfer correctly, leading to faded, blurry, and disappointing results.
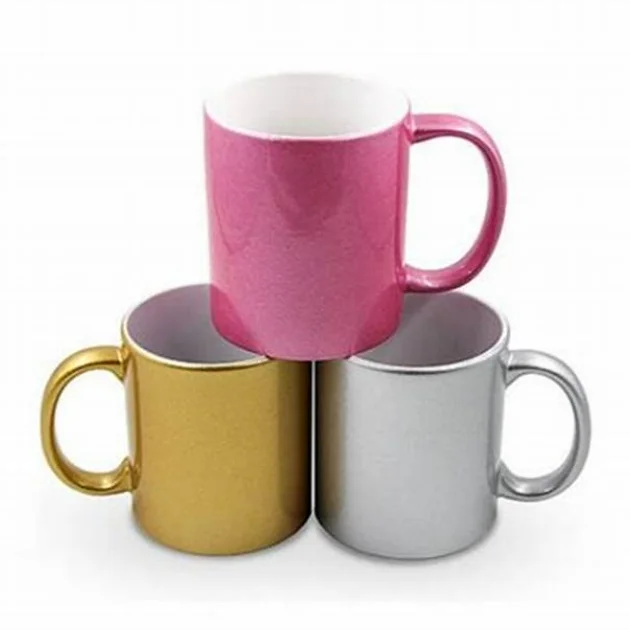
The Canvas: High-Quality Blank Sublimation Mugs
This brings us to the canvas itself—the blank mug. As we have established, you cannot use any ceramic mug off a retail shelf. A mug must be prepared for sublimation with a specialized, uniform coating of a polyester-based polymer. This coating is the invisible gateway that allows the sublimated dye to enter. The quality of this coating is arguably the most significant variable in the entire process. At our facility, where we have both a ceramic mug production line and a dedicated sublimation coating workshop, we maintain obsessive control over this step. The coating must be of a precise thickness, applied with perfect uniformity, and cured correctly to create a flawless surface. Any imperfection—a thin spot, a drip, a speck of dust—will be glaringly obvious in the final print. This is why sourcing your personalized ceramic cups from a dedicated factory with a proven track record, one that controls the entire process from clay to coating, is the most reliable path to achieving consistently excellent results. The mug is not just a cup; it’s a piece of precision equipment.
The Catalyst: The Mug Heat Press
The mug heat press is the alchemical chamber where the transformation occurs. It is designed to provide two essential elements: consistent, uniform heat and even, firm pressure. A quality press will have a heating element that wraps around the mug, ensuring that the entire surface of the design receives the same temperature. Fluctuations in temperature across the surface can lead to uneven color and patchy transfers. Similarly, the clamping mechanism must apply consistent pressure, holding the transfer paper tightly against every curve of the mug. This pressure ensures intimate contact, which is necessary for the gaseous dye to move efficiently from the paper into the polymer coating. While convection ovens with silicone wraps can be used as an alternative, a dedicated mug press offers far superior control and consistency, which is vital for professional work and repeatable results.
The Supporting Cast: Essential Accessories
Finally, a few smaller items are indispensable. Heat-resistant tape is crucial for securing the transfer paper to the mug. It must hold the paper firmly in place without leaving any residue or interfering with the sublimation process. A standard office tape would melt and ruin the mug. Protective gloves, specifically heat-resistant ones, are a safety necessity for handling the mug immediately after it comes out of the press, as it will be extremely hot (upwards of 200°C or 400°F). Lastly, a lint-free cloth is needed for the simple but vital step of wiping down the mug before application to remove any dust or oils that could interfere with a perfect transfer. Each piece in this toolkit, from the printer to the cloth, contributes to a controlled, repeatable, and successful process.
Common Pitfalls and How to Avoid Them: A Sublimation Troubleshooting Guide
Even with the finest tools and a solid understanding of the scientific principles, the path to mastering the creation of personalized ceramic coffee mugs can present challenges. The process is a delicate balance of variables, and a slight deviation in one can manifest as a visible imperfection in the final product. For the novice, these issues can be a source of immense frustration, while for the seasoned professional, they represent opportunities for refinement and process optimization. The ability to diagnose and rectify these problems is what separates the amateur from the expert. This table serves as a diagnostic chart, a guide to understanding the symptoms of a flawed print, identifying the likely root causes, and implementing the correct remedy. Approaching these challenges not as failures, but as data points in a learning process, is the key to achieving consistent, flawless results.
| Symptom (The Problem) | Likely Root Cause(s) | Corrective Action (The Solution) |
|---|---|---|
| Faded or “Ghosted” Images The design appears washed out, light, or has a faint double image next to sharp lines. | 1. Insufficient Time/Temperature: The dye did not have enough energy or time to fully sublimate and transfer. 2. Insufficient Pressure: The paper was not held tightly against the mug, creating gaps. 3. Paper Shift: The transfer paper moved slightly when opening the press or during the peel. | 1. Calibrate: Increase the press time or temperature in small increments (e.g., 10 seconds or 5°F/3°C). Consult your blank mug supplier for recommended settings. 2. Adjust Pressure: Tighten the press to ensure a firm, snug fit. The mug should be difficult, but not impossible, to place and remove. 3. Secure & Peel Carefully: Use high-quality heat tape in at least two places. Open the press smoothly and peel the paper off in one swift, confident motion. |
| Blurry or Fuzzy Edges The lines of the artwork are not crisp and appear to bleed at the edges. | 1. Excessive Time/Temperature: The dye over-sublimated, causing the gas to spread beyond the intended area under the polymer coating. 2. Moisture: Ambient humidity or moisture in the transfer paper or on the mug surface turned to steam in the press, blurring the ink. 3. Low-Resolution Artwork: The source image itself was blurry or low quality (below 300 DPI). | 1. Reduce Settings: Decrease the press time or temperature. A common cause is leaving the mug in for too long. 2. Pre-Press & Store Properly: Press the blank mug for 5-10 seconds before applying the transfer to evaporate moisture. Store sublimation paper in a dry place, preferably a sealed plastic bag. 3. Check Your Source: Always design and print using high-resolution files. Zoom in on your design on-screen to check for pixelation before printing. |
| Uneven or Splotchy Color Areas of solid color appear mottled, with darker and lighter patches. | 1. Uneven Pressure: The heat press is not applying pressure uniformly across the entire design surface. 2. Uneven Heating: The heating element in the press has hot or cold spots. 3. Poor Quality Mug Coating: The polymer coating on the mug is inconsistent, with varying thickness, preventing uniform dye absorption. | 1. Check Press Fit: Ensure the mug fits the press element correctly. If using a tapered latte mug, you need a tapered heating element. 2. Test Your Press: Use temperature test strips to check for consistency across the heating element. A failing press may need replacement. 3. Source Quality Blanks: This is often the culprit. Use mugs from a reputable supplier known for quality control. A cheap mug will always produce cheap results. This is where a factory-direct source like Zibo TopSub becomes invaluable. |
| Small Dots or Speckles The final print has tiny, unwanted dots of color or voids in the color. | 1. Dust or Debris: A speck of dust, lint, or even a stray fiber was on the mug or paper before pressing. 2. Dried Ink on Nozzles: The printer nozzles may have partially clogged, causing them to “spit” tiny droplets of ink. 3. Moisture Eruption: A tiny droplet of moisture on the mug surface can flash to steam, violently pushing the ink away and leaving a white spot. | 1. Meticulous Cleaning: Wipe the mug surface thoroughly with a lint-free cloth immediately before applying the transfer. Keep your work area clean. 2. Printer Maintenance: Run a nozzle check and head cleaning cycle on your sublimation printer before printing your final design. 3. Pre-Press the Mug: As mentioned before, a quick pre-press of the blank mug can eliminate any residual moisture. |
| Yellowing or Browning on White Areas The white areas of the mug have taken on a yellow or brown tint after pressing. | 1. Excessive Heat or Time: The mug was “cooked” for too long or at too high a temperature, scorching the polymer coating. 2. Low-Quality Transfer Paper: Some cheaper papers can leave a residue or scorch more easily at high temperatures. | 1. Reduce Settings: Lower the temperature or time significantly. This is a clear sign that your settings are too aggressive for the specific mug/paper combination. 2. Use Quality Consumables: Invest in a reputable brand of sublimation paper. It is also wise to use a protective sheet of plain paper or a Teflon sheet between the transfer and the heating element. |
The 7-Step Process to Flawless Personalized Ceramic Coffee Mugs
We now arrive at the practical application of our accumulated knowledge. The creation of a personalized ceramic mug is a process, a sequence of deliberate actions where each step builds upon the last. It is a dance between digital design and physical craft, between creative intent and technical execution. To treat it as a mere mechanical procedure is to miss the potential for artistry. By approaching these seven steps with mindfulness and an appreciation for the role each one plays, you can transform a blank vessel into a vibrant, enduring object of personal significance. This is the path from concept to creation.
Step 1: The Conceptual Heart – Designing Your Masterpiece
Before a single drop of ink is printed, the mug exists as an idea. This initial stage is arguably the most human part of the process, as it involves translating emotion, memory, or identity into a visual form. A great mug design does more than just decorate; it communicates. It might be a cherished photograph of family, a witty quote that brings a smile, a stunning piece of abstract art, or a company logo that represents a collective endeavor. The central question to ask is: what feeling or message do I want to evoke every time someone holds this mug? The answer to this question forms the soul of your project.
From a technical standpoint, this soul must be given a proper digital body. The foundation of a crisp, clear transfer is a high-resolution source file. Your design canvas should be set to a resolution of at least 300 Dots Per Inch (DPI) at the final print size. This ensures that the printer has enough data to create sharp lines and smooth tones, avoiding the pixelated or “jaggy” look of a low-resolution image. You must also consider the dimensions of your mug. Measure the height and circumference of the printable area and create your design template accordingly, leaving a small margin at the top, bottom, and near the handle where printing can be inconsistent. When it comes to software, the options are vast. Professional graphic designers will gravitate towards the power and control of Adobe Photoshop for photo manipulation or Adobe Illustrator for vector graphics. However, for those seeking a more accessible entry point, platforms like Canva or GIMP offer powerful tools with a gentler learning curve, many of which include pre-sized mug templates to simplify the process.
Step 2: The Digital Translation – Printing Your Design
With your design finalized, the next step is to translate it from the digital realm onto your sublimation transfer paper. This is more than a simple “File > Print” command. The first, and most critical, setting to enable is “Mirror Image” or “Flip Horizontally.” This is a step that trips up every beginner at least once. Because the printed paper will be placed face-down onto the mug, the image must be printed in reverse for it to appear correctly on the final product. Forgetting this step will result in backward text and reversed images, a frustrating and wasteful mistake.
Beyond mirroring, you must configure your printer to work in harmony with your specific paper and inks. This involves selecting the correct paper type in the print dialog—often a setting like “premium matte” or a specific setting provided by your paper manufacturer—to ensure the right amount of ink is deposited. The most crucial setting for color fidelity, however, is the ICC Profile. An ICC (International Color Consortium) profile is a small data file that acts as a translator, ensuring that the colors you see on your monitor are the colors your printer produces with your specific ink and paper combination. Without the correct profile, your vibrant reds might print as orange, and your deep blues might look purple. Your sublimation ink or printer supplier (like Sawgrass) will provide these profiles. Installing and selecting the correct one is the secret to achieving predictable, accurate, and stunning color reproduction, transforming your printing from guesswork into a controlled science.
Step 3: The Preparation Ritual – Getting the Mug Ready
The mug, your blank canvas, must be impeccably prepared. Even a brand new mug straight from the box can have microscopic dust, lint from the packaging, or oils from being handled. These invisible contaminants can block the sublimation process, resulting in tiny white dots or imperfections in the final print. To prevent this, take a soft, lint-free cloth and wipe the entire surface of the mug thoroughly. Some practitioners use a small amount of isopropyl alcohol on the cloth for an even deeper clean, but you must ensure it has fully evaporated before proceeding.
Once the mug is clean, you will prepare your printed transfer. Trim the excess paper from around your design, leaving a small border. This makes it easier to handle and align. Position the transfer paper onto the mug, ensuring it is straight and centered. The tightness of the wrap is paramount. The paper must be in direct, firm contact with the entire surface of the mug that is to be printed. Any air gaps will result in blurry or faded spots. Use at least two or three pieces of high-quality heat-resistant tape to secure the paper firmly. Place one piece along the edge of the paper to form a tight seam, and another to anchor the top or bottom. Do not place tape over the printed area itself, as the adhesive can sometimes interfere with the color. This careful, deliberate wrapping is a ritual that pays dividends in the quality of the final transfer.
Step 4: The Alchemical Transformation – The Heat Press Process
Here we arrive at the heart of the physical transformation. The heat press is not a simple oven; it is a precision instrument that must be calibrated to what is often called the “holy trinity” of sublimation: time, temperature, and pressure. These three variables are interconnected, and the correct combination is essential for success. For most standard 11oz ceramic mugs, a typical starting point is a temperature between 180°C to 200°C (360°F to 400°F), for a duration of 180 to 240 seconds. Pressure should be set to medium-firm; you should be able to close the press with a firm, confident motion, but not have to strain excessively. It is vital to understand that these are not universal figures. The ideal settings can vary based on your specific press, the brand of mugs you are using, the paper, and even the ambient temperature of your workshop. Always start with the recommendations provided by your blank mug supplier—a good supplier will have tested their products extensively—and be prepared to perform a few test presses to dial in the perfect settings for your unique setup.
With the press preheated to the target temperature, carefully place the prepared mug into the heating element cradle. Ensure it is centered and that the wrap will make full contact with the heating surface. Close the press. The timer will begin its countdown. This is the moment of alchemy, where solid turns to gas, and the polymer pores of the mug open to receive the design. Resist any temptation to open the press early. Allow the process to complete fully. When the timer beeps, it signals that the transformation is complete.
Step 5: The Grand Reveal and Cooling
The moment the timer sounds, act with purpose and caution. Wearing your heat-resistant gloves, open the press and carefully remove the mug. It will be incredibly hot. Place it on a heat-resistant surface, like a ceramic tile or a heat mat. Now comes the grand reveal, often called the “hot peel.” While the mug is still hot, carefully and swiftly peel away the transfer paper. You want to do this in one smooth motion to avoid any chance of the paper shifting and causing a faint “ghost” image. As you peel back the paper, you will see your vibrant, glossy design fully infused into the surface of the mug. The image on the used transfer paper will look faded and washed out, which is a good sign—it means the ink has successfully moved from the paper to the mug.
Once the paper is removed, the final critical phase is cooling. The polymer coating needs to cool and harden fully, trapping the dye permanently. The most common beginner mistake is to try and speed up this process by dunking the hot mug in cool water. This can cause thermal shock, leading to the ceramic cracking or the glaze crazing. The best practice is simply to let the mug cool naturally at room temperature. It may take 10-15 minutes to be cool enough to handle safely. This patient cooling ensures the structural integrity of the mug and the permanence of your beautiful design.
Step 6: Quality Control and Refinement
Once the mug has completely cooled, it is time for a critical inspection. Examine the entire print under good lighting. Look for the hallmarks of quality: are the colors vibrant and true to your original design? Are the lines crisp and the text sharp? Is the color even across the entire surface, with no light or dark patches? Run your fingers over the design; it should be perfectly smooth, with no perceptible texture difference between the printed and unprinted areas. This is your final check, your confirmation that the science, the tools, and your technique have all worked in concert.
Inevitably, especially when you are starting out, you may find imperfections. Do not be discouraged. Every flawed mug is a lesson. Refer back to the troubleshooting table. Was the image a bit blurry? Perhaps you need to reduce your time or temperature slightly. Were there faded spots? Your pressure might have been too low, or the mug coating itself may have been inconsistent. Keep a small notebook where you log your settings (time, temp, pressure) for each type of mug you press, along with a photo of the result. This data-driven approach will allow you to learn from your mistakes and rapidly refine your process, turning initial challenges into expert-level consistency.
Step 7: Beyond the Single Mug – Scaling Up and Business Considerations
Mastering the creation of a single, perfect personalized ceramic mug is a significant achievement. Scaling that skill into a consistent, profitable business venture is another level of challenge entirely. The principles of quality remain the same, but the focus shifts to efficiency, consistency, and sourcing. When you are producing dozens or hundreds of personalized ceramic cups, you cannot afford the variability that comes from inconsistent materials. Your customers will expect the mug they order in June to be identical in quality to the one they ordered in January.
This is where your choice of supplier becomes the most critical business decision you will make. Sourcing blank mugs from a true factory-direct partner, rather than a reseller, offers profound advantages. As a company with over a decade of experience manufacturing the ceramic bodies and applying the sublimation coatings in-house, we at Zibo TopSub provide a level of consistency that is difficult to find elsewhere. A direct relationship means access to a reliable supply chain, ensuring you never run out of stock during peak seasons. It means unparalleled quality control, as the entire process is managed under one roof. Furthermore, a factory partner can offer services that are essential for growth, such as Original Equipment Manufacturer (OEM) services to produce a unique mug shape just for your brand, or Original Design Manufacturer (ODM) services to help you develop and produce exclusive product lines. When you are ready to move beyond the hobbyist stage, partnering with an experienced manufacturer is the foundational step to building a scalable and reputable brand.
This mindset also extends to exploring the vast world of sublimation blanks beyond the standard 11oz mug. Your equipment and skills are directly transferable to a huge array of products that customers desire. Consider expanding your offerings to include stainless steel tumblers, elegant glass photo frames, ceramic tiles for decorative murals, or even sublimation-ready puzzles and keychains. Each new product line opens up new markets and customer segments. By building a relationship with a versatile supplier who can provide high-quality blanks across all these categories, you create an efficient, single-source supply chain that allows you to focus on what you do best: creating beautiful, personalized products for your customers.
Advanced Techniques and Creative Horizons
Once you have achieved mastery over the fundamental process of creating personalized ceramic mugs, a whole new world of creative possibilities opens up. The skills you have developed are a foundation upon which you can build more complex and visually striking creations. One of the most sought-after advanced techniques is the full-wrap or “bleed” design. This involves printing an image that covers the entire surface of the mug, from top to bottom and edge to edge, right up to the handle. This requires precise template measurement, careful wrapping to avoid wrinkles at the top and bottom curves, and often a slightly longer press time to ensure the thicker ceramic near the base and rim reaches the full sublimation temperature. The result is a stunning, seamless piece of art that has a much higher perceived value than a simple centered photo.
Another avenue for creative expansion lies in working with non-standard mug shapes and materials. Your cylindrical mug press may have interchangeable heating elements designed for conical “latte” mugs, smaller espresso cups, or even shot glasses. Each shape requires its own specific template, wrapping technique, and press settings. Venturing into these forms allows you to cater to a wider range of customer preferences. Furthermore, the world of sublimation extends far beyond ceramics. You can apply the same principles to create vibrant designs on specially coated stainless steel travel mugs and tumblers, which are incredibly popular for their durability and insulation. You can create elegant personalized keepsakes on glass photo frames or produce unique decorative items on sublimation-ready aluminum sheets. Each new material has its own nuance—glass, for example, requires a lower temperature and must be pressed face down—but the core science remains the same. As a manufacturer, we produce a wide variety of these blanks, including stainless steel, aluminum, and enamel cups, allowing our partners to diversify their product catalogs with the same assurance of quality they get with our ceramic mugs.
Perhaps the most magical of all advanced techniques involves the use of color-changing or “magic” mugs. These personalized ceramic coffee mugs are coated with a thermochromic (heat-sensitive) black or colored layer on top of the standard sublimation coating. At room temperature, the mug appears to be a solid color, hiding the design beneath. When a hot liquid is poured into the cup, the heat causes the thermochromic layer to become transparent, dramatically revealing the sublimated image underneath. This creates a moment of surprise and delight for the recipient. Printing on these mugs follows the standard process, but the design must be conceived with the reveal in mind. This technique is especially powerful for gift items, proposals, and promotional reveals, adding an interactive and memorable element to the personalized product.
The Human Element: The Enduring Appeal of a Personalized Gift
In our examination of the technical and scientific aspects of creating personalized ceramic mugs, it is possible to lose sight of the fundamental human impulse that drives this entire enterprise. Why do we feel compelled to take a mass-produced object and imbue it with a unique identity? The answer, I believe, lies in the mug’s role as a vessel—not just for coffee or tea, but for memory, affection, and daily ritual. A standard, unadorned mug is a tool; a personalized mug is a story. It is a quiet participant in our morning routines, a warm presence on our desks, a small, tangible link to a person, a place, or a moment that matters.
As Martha Nussbaum argues in her philosophical work, our emotional lives are deeply intertwined with objects and narratives that help us make sense of the world and our place within it (Nussbaum, 2001). A personalized ceramic cup becomes a narrative object. The photograph of a child’s laugh, the shared joke printed in a familiar font, the logo of a team we feel part of—these are not mere decorations. They are fragments of our identity and our connections made manifest. In a world of mass production, an object that has been specifically tailored to an individual is a powerful statement. It says, “I see you. I know you. I have created this just for you.” The act of giving such a gift is an act of recognition, a confirmation of the recipient’s unique and cherished individuality. It is a way of embedding our care into the fabric of their daily life.
The process of sublimation, by physically infusing the image into the mug, serves as a potent metaphor for this emotional process. The memory or message is not superficially applied; it becomes an inextricable part of the object itself. It cannot be peeled away or easily erased. It endures, just as we hope the connection it represents will endure. When we, as creators and manufacturers, engage in this work, we are not simply selling ceramic goods. We are facilitating the creation of these small but significant artifacts of human connection. We are providing the high-quality, reliable canvas upon which our customers can tell their stories, one mug at a time. It is a craft rooted in precision and science, but its ultimate purpose is to serve the deeply human need for expression, recognition, and belonging.
Frequently Asked Questions (FAQ)
Can I use a regular mug from a department store for sublimation?
This is a very common and important question. The answer is unequivocally no. A standard ceramic mug, no matter how high its quality, lacks the essential polymer coating required for the sublimation process. The science of sublimation relies on this special polyester-based coating, whose pores open when heated to accept the gaseous dye. If you attempt to press a design onto a non-sublimation mug, the ink will have nowhere to go. The design will not transfer, and you will be left with a faint, blurry smear on the surface that will likely wipe right off. You must use blank mugs that are specifically sold as “sublimation-ready,” as these have been treated with the necessary coating in a factory setting. Sourcing your personalized ceramic mugs from a specialized manufacturer ensures this critical coating is applied correctly for vibrant and permanent results.
My colors look wrong. The print on the mug doesn’t match my computer screen. Why?
This is one of the most frequent frustrations for newcomers and is almost always a color management issue. What you see on your backlit computer monitor (which uses an RGB—Red, Green, Blue—color model) can be very different from what a printer produces using ink (which uses a CMYK—Cyan, Magenta, Yellow, Black—color model). The key to bridging this gap is using an ICC Profile. An ICC profile is a specific file that tells your printer exactly how to translate the screen colors into the correct ink mixtures for your specific combination of printer, sublimation ink, and sublimation paper. Without the correct profile, the printer is just guessing, which often results in color shifts—blues may look purple, reds may look orange, and skin tones can be off. Ensure you have installed the correct ICC profile from your ink supplier and have selected it in your printer’s advanced settings dialog box. This single step is the most critical for achieving accurate and predictable color.
Is the design from sublimation truly permanent and dishwasher safe?
Yes, absolutely. This is the primary advantage of sublimation over other personalization methods like vinyl decals or paint markers. Because the sublimation process infuses the dye directly into the polymer coating of the mug, the image is not on the surface; it’s in the surface. The design is protected by the same hard, glossy coating as the rest of the mug. This makes it incredibly durable. A properly sublimated personalized ceramic coffee mug can be washed in a dishwasher (top rack recommended for longevity of the coating itself) and used in a microwave without any risk of the image fading, peeling, cracking, or washing away. It is a truly permanent, professional-grade application.
Can I use my regular home oven instead of buying a dedicated mug heat press?
It is technically possible to sublimate mugs in a convection oven, but it comes with significant trade-offs compared to a mug press. To do this, you would need to tape your design onto the mug and then wrap it very tightly with a silicone mug wrap or shrink-wrap sleeve, which is designed to provide the necessary pressure during baking. You would then bake it in a convection oven (a regular oven is not recommended as it may have hot spots) at a similar temperature for a longer period. The main disadvantages are a lack of consistent pressure, which can lead to less vibrant or uneven results, and the critical fact that any oven used for sublimation should never be used for food preparation again due to the chemical fumes released. A dedicated mug press provides far more consistent heat and pressure, leading to more reliable, professional results and is the recommended method for anyone serious about quality.
What is the difference between a standard white sublimation mug and a “patch mug”?
A standard white sublimation mug is coated with the polymer from top to bottom, allowing you to print a design anywhere on its surface, including a full-wrap design. A “patch mug” is a type of colored mug (e.g., black, blue, red) that has a specific, pre-defined white area, or “patch,” that has been treated with the sublimation coating. The rest of the colored mug is uncoated. This allows you to sublimate a full-color photo or design onto the white patch, creating a striking contrast with the colored body of the mug. It’s a stylistic choice that creates a “framed” look for your artwork. We manufacture both fully coated white personalized ceramic cups and a variety of patch mugs to provide our partners with a wide range of creative options for their customers.
References
- Sawgrass Technologies, Inc. (2024). What is Sublimation Printing? Sawgrass Ink Official Blog.
- ScienceDirect. (2020). Dye Sublimation – an overview. Elsevier B.V.
- International Color Consortium. (2025). ICC Profiles.
- Adobe Inc. (2024). Color management in Adobe Photoshop. Adobe Help Center.
- Nussbaum, M. C. (2001). Upheavals of Thought: The Intelligence of Emotions. Cambridge University Press.
- Shore, J. (2002). The chemistry of dyes and principles of dyeing. In D. G. Duff & J. A. Bone (Eds.), The Society of Dyers and Colourists.
- Kipphan, H. (Ed.). (2001). Handbook of Print Media: Technologies and Production Methods. Springer-Verlag Berlin Heidelberg.
- Plastics Decorating. (2012). An Introduction to Dye Sublimation. Peterson Publications, Inc.
- Google Scholar. (2025). Scholarly articles on Polymer Coatings for Dye Sublimation.
- Gifts & Decorative Accessories. (2024). State of the Industry: Trends in Personalized Gifts. BridgeTower Media.