

 Spanish
  English
  Russian
  German
  Arabic
  Italian
  Portuguese
  French
  Greek
Greek  Polish
  Swedish
 The phenomenon of “ghosting”—a faint, secondary image or blur appearing adjacent to the primary design—represents a significant challenge in the dye-sublimation printing of ceramic mugs. This issue, stemming from micro-movements of the transfer paper during the sublimation process, compromises the final product’s aesthetic quality and commercial value. This article provides a comprehensive examination of the multifaceted causes of ghosting, rooted in the physics of heat transfer, the chemistry of dye-polymer interaction, and the mechanics of the printing process. It deconstructs the problem into seven key areas of control: securement of the transfer, pressure application, moisture management, time and temperature calibration, post-press cooling protocols, consumable quality, and workflow discipline. By adopting a pedagogical approach, the text elucidates the scientific principles behind each factor, offering a structured, systematic methodology for diagnosing and eliminating ghosting. The objective is to equip both novice and experienced practitioners with the deep-seated knowledge required to consistently achieve crisp, high-definition results, thereby transforming a common source of production loss into a showcase of technical mastery and providing a definitive guide on how to avoid ghosting during sublimation on ceramic mugs.
Key Takeaways
- Secure sublimation paper with high-temperature tape to prevent any micro-shifts.
- Calibrate your mug press for firm, even pressure across the entire surface.
- Always pre-press both the mug and the paper to eliminate all moisture.
- Master the precise time and temperature balance for your specific equipment.
- Implement a controlled cooling process to stop the ink from gassing out.
- Use superior quality consumables for consistent and predictable results.
- Follow a meticulous workflow to master how to avoid ghosting during sublimation on ceramic mugs.
Table of Contents
- Understanding the Ghost in the Machine: The Science of Sublimation Ghosting
- Secret #1: Mastering the Art of Securement
- Secret #2: The Unwavering Quest for Perfect Pressure
- Secret #3: Conquering the Invisible Enemy: Moisture
- Secret #4: The Symphony of Time and Temperature
- Secret #5: The Post-Press Ritual: A Cooling Process of Precision
- Secret #6: The Foundation of Quality: Choosing Superior Consumables
- Secret #7: Cultivating a Meticulous Workflow and Environment
- Frequently Asked Questions (FAQ)
- Conclusion
- References
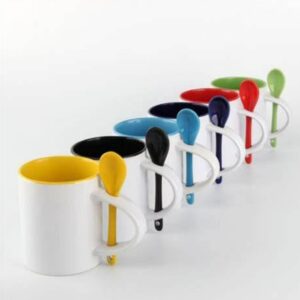
Understanding the Ghost in the Machine: The Science of Sublimation Ghosting
Before we embark on the practical strategies to defeat the spectral antagonist of our craft, we must first engage in a deeper inquiry. What, in its essence, is this “ghosting” that plagues our ceramic canvases? To approach this question with the seriousness it deserves is to move beyond mere troubleshooting and into the realm of scientific understanding. The solution to a problem often lies within a thorough comprehension of its nature. The faint shadow that mocks a sharp line or the soft blur that muddies a vibrant color is not an apparition; it is a predictable, physical outcome of a process gone slightly awry. It is a footprint left by a moment of instability. Our task, then, is not one of exorcism but of stabilization, of creating an environment so perfectly controlled that these spectral footprints have no opportunity to form.
At its heart, sublimation is a marvel of phase transition. We are taking a solid—the dye ink embedded in our transfer paper—and, by applying heat and pressure, transforming it directly into a gas. This gaseous dye then permeates the very structure of the mug’s surface, a specialized polymer coating that becomes receptive when heated. As the mug cools, the polymer pores close, trapping the dye permanently within. The final image is not sitting on the mug; it has become a part of it. This is why sublimated mugs are so durable, their images resistant to scratching and fading. But this process of gaseous transfer is where our vulnerability lies. A gas, by its nature, is diffuse. It seeks to expand. If the source of that gas—the transfer paper—moves even a fraction of a millimeter while the dye is in its gaseous state and the polymer is receptive, the dye will settle in a slightly different location. This creates a secondary, fainter impression. This is ghosting. Our entire endeavor, therefore, is to ensure the absolute, unwavering immobility of the sublimation paper relative to the mug’s surface throughout the entire heating and cooling cycle.
The Anatomy of a Sublimation Mug and the Polymer’s Role
Let us consider the mug itself. A standard ceramic mug from a department store is not a suitable candidate for sublimation. Why? It lacks the most vital component: the receptive polymer coating. A high-quality sublimation mug, like the specialized tazas de cerámica de sublimación designed for this process, is treated with a custom-engineered polyester-based coating. Think of this coating at room temperature as a smooth, crystalline solid, its molecular chains locked tightly together. It is non-porous and impermeable.
When we introduce heat, a fascinating transformation occurs. Around 180-200°C (356-392°F), this polymer coating undergoes what is known as a “glass transition.” It doesn’t melt in the conventional sense, but it softens and its molecular structure opens up, creating microscopic pores. It becomes, for a brief period, receptive to the gaseous sublimation dye. The dye molecules, now energized and in their gaseous state, are drawn into these open pores, diffusing into the polymer matrix. As we will discuss in the cooling section, when the heat is removed, the polymer rapidly returns to its solid, crystalline state, the pores close, and the dye molecules are permanently encapsulated. The quality of this coating is paramount. An uneven coating will lead to patchy, inconsistent color. A coating that is too thin will not be able to accept enough dye, resulting in a washed-out image. This is a foundational element where quality cannot be compromised.
Categorizing the Apparition: Types of Sublimation Ghosting
To effectively combat an issue, one must first learn to identify its specific manifestations. Not all ghosting is identical. By observing the specific character of the flaw, we can deduce its most likely cause, allowing for a more targeted and efficient remedy. It is akin to a physician diagnosing an illness not just by the presence of a fever, but by the nature of the fever and its accompanying symptoms. Let us categorize these spectral footprints.
Motion Ghosting: This is the most common and classic form. It appears as a faint, blurry shadow or a duplicate image, typically offset in a single direction. It is the direct result of the sublimation paper shifting during the press. This can happen when placing the mug in the press, clamping the press, or, most critically, when removing the mug from the press while it is still hot. The paper might slide against the surface, smearing the still-gaseous ink.
Pressure Ghosting: This form is more subtle and can be perplexing. It often manifests as a “bleeding” or “feathering” effect along the edges of a design element. This is not caused by the paper sliding, but by it lifting or fluttering. If the pressure is uneven, small pockets or gaps can form between the paper and the mug’s surface. The gaseous dye escapes into these gaps, spreading beyond the intended boundaries of the design, resulting in a hazy or fuzzy edge.
Moisture Ghosting: This type of ghosting presents as a blowout or a mottled, uneven patch of color, often accompanied by a blueish tint. It is the result of trapped moisture in the paper or on the mug’s surface turning into steam during the heating process. This explosive release of steam can force the dye away from its intended area, creating a blurry, watery effect and disrupting the smooth transfer of color. It is a violent, microscopic event with visually disastrous consequences.
| Type of Ghosting | Visual Cue | Primary Cause | Diagnostic Question |
|---|---|---|---|
| Motion Ghosting | Faint, blurry, directional shadow or duplicate image. | Physical shift or sliding of the transfer paper during heating or removal. | Is my paper secured so tightly that it is physically impossible for it to slide? |
| Pressure Ghosting | Feathered, hazy, or bleeding edges on the design. | Uneven or insufficient pressure, allowing paper to lift or flutter. | Is the pressure perfectly uniform across the entire design area, with no gaps? |
| Moisture Ghosting | Mottled, faded, or “blowout” areas with a possible blueish tint. | Trapped moisture turning to steam, forcefully displacing the dye gas. | Have I completely eliminated every trace of moisture from both the mug and the paper? |
| Category | Item | Critical Function | Sign of Quality |
|---|---|---|---|
| Equipment | Quality Mug Press | Provides consistent, even heat and pressure. | Solid construction, accurate digital controller, even heating element. |
| Sublimation Printer | Prints the design using sublimation inks. | Reliable brand (e.g., Sawgrass, Epson), uses dedicated sublimation ink profiles. | |
| Dehumidifier | Controls ambient humidity in the workspace. | Appropriate size for the room, maintains a stable, low humidity level. | |
| Materials | High-Quality Sublimation Mugs | Provides the receptive polymer coating for the dye. | Perfectly smooth, even coating; no visible pits, bumps, or defects. |
| Sublimation Paper | Holds and releases the sublimation ink as a gas. | High ink release rate, dries quickly, does not curl excessively. | |
| Sublimation Ink | The solid dye that turns into a gas. | Vibrant colors, no clogging issues, made for your specific printer model. | |
| High-Temperature Tape | Secures the transfer paper to the mug. | Withstands up to 220°C (428°F) without leaving residue or melting. | |
| Accessories | Protective Paper (Butcher/Parchment) | Protects the heat press from excess ink blowout. | Uncoated, lint-free, withstands high temperatures without scorching. |
| Heat-Resistant Gloves | Protects hands from severe burns. | Rated for high temperatures, allows for dexterity. |
Secret #1: Mastering the Art of Securement
The first principle in our quest to learn how to avoid ghosting during sublimation on ceramic mugs is the principle of absolute immobility. We must treat the sublimation transfer paper not as a simple wrapper but as a crucial component that must be bonded to the mug with surgical precision. The slightest tremor, the most minute slip at the critical moment of gaseous transfer, is the original sin from which ghosting is born. Our goal is to create a temporary, yet unyielding, union between paper and ceramic that can withstand the forces of handling and the pressures of the heat press itself.
The Physics of Paper Movement: Why Even Micro-shifts Matter
Let us contemplate the scale at which we are working. A crisp, 1200 DPI (dots per inch) image means that each dot of color is roughly 21 micrometers in diameter. A human hair, for comparison, is about 70 micrometers thick. The blurriness we perceive as ghosting can be caused by a shift of just 30 or 40 micrometers—half the thickness of a human hair. This is a movement that is nearly imperceptible to the naked eye during the process, yet its result is glaringly obvious on the final product.
What forces cause these micro-shifts? First, there is the mechanical force of placing the mug into the press. Any slight jostle or bump can cause the paper to slide. Second, as the heat press clamp is engaged, the pressure itself can cause the paper to buckle or move if not perfectly applied and secured. Third, and perhaps most insidiously, is the removal. When the timer goes off, our instinct is to work quickly. The mug is extremely hot, and the paper is now brittle from the heat. As we open the press and handle the mug, the paper can easily slide against the still-receptive polymer coating. This final-moment slip is a frequent culprit, creating a distinct “smear” ghost. Therefore, our securement strategy must account for all three phases: insertion, pressing, and removal.
Choosing Your Weapon: High-Temperature Tapes vs. Shrink Wraps
Our primary tool in this battle for stability is adhesive tape. However, not just any tape will suffice. Standard office tape would melt into a sticky, disastrous mess, permanently ruining the mug and potentially the heat press. We require a specialized high-temperature tape, typically a polyimide film with a silicone-based adhesive. These tapes are engineered to withstand the intense heat of the sublimation process—often up to 220°C (428°F) or more—without degrading, melting, or leaving behind any adhesive residue. They provide a strong hold yet can be removed cleanly after cooling.
An alternative, particularly for full-wrap designs or irregularly shaped items, is a sublimation shrink wrap sleeve. These are polymer sleeves that, when exposed to heat (either in the press or more commonly with a heat gun before pressing), shrink tightly around the mug, conforming to its shape and applying even pressure across the entire surface. The sleeve itself holds the paper in place. While tape is excellent for targeted securement, shrink wrap excels at providing both security and uniform pressure, making it a powerful tool, especially when using a convection oven instead of a traditional mug press. For standard mug press operations, however, a masterful taping technique is often the most direct and efficient method.
The Taping Technique: A Surgeon’s Precision for Zero Movement
The application of heat-resistant tape is not a matter of mere attachment; it is a deliberate technique. Rushing this step is a false economy, as it is the foundation of a successful print. Here is a protocol for achieving a truly secure transfer:
- Preparation: After printing your design, trim the paper so that there is minimal excess, but enough to handle. A margin of about 1 cm (0.4 inches) around the design is often sufficient. Ensure the mug surface is clean, dry, and free of any dust or oils from your fingers.
- Wrapping: Wrap the paper tightly around the mug. The goal is to have the paper lie as flat and smooth as possible against the ceramic surface. Pull it taut, but not so tight that you risk tearing it. The seam where the paper overlaps should be in a non-critical area of the design if possible, such as the area that will be hidden by the handle.
- The Anchor Points: Your taping strategy should create a web of stability. Start with the main seam. Apply a long piece of tape vertically along the entire length of the paper’s seam, sealing it shut. This is your primary anchor.
- Top and Bottom Security: Next, focus on the top and bottom edges of the paper. These are high-risk areas for lifting and movement. Apply several pieces of tape that start on the paper, wrap over the edge, and adhere to the mug’s surface (top and bottom). Place these pieces every few centimeters around the circumference. This “strapping” technique prevents the paper from shifting up or down and also helps to seal the edges, preventing the gaseous dye from escaping and causing pressure ghosting.
- Handle Area Triangulation: The areas nearest the handle are notoriously tricky. The curvature of the mug changes here, and it is easy for gaps to form. Use smaller pieces of tape to create a triangulation of force. Tape from the paper to the mug on both sides of the handle, ensuring the paper is pulled snugly into the curves.
When you are finished, the paper should feel like a second skin on the mug. There should be no visible gaps, no ripples, and no areas where you can easily slide the paper with your finger. You have created a secure vessel, ready for the transformative fire of the press.
The Shrink Wrap Method: Achieving Uniform Pressure and Security
For those utilizing a convection oven, the shrink wrap method is not just an alternative; it is often the superior choice. The process is different but the underlying principle of immobility remains the same. After wrapping the paper around the mug (a single piece of tape to hold it in place initially is helpful), you slide the mug into a shrink sleeve. Using a heat gun, you carefully apply heat to the sleeve. It will begin to shrink dramatically, conforming to every curve of the mug and applying firm, consistent pressure across the entire surface of the paper. This method virtually eliminates the risk of pressure ghosting caused by gaps, as the wrap forces the paper into intimate contact with the coating. It also provides excellent security against motion ghosting. The key is to ensure the sleeve is fully shrunk and tight before placing the mug into the oven. Any looseness in the wrap is a potential point of failure. This method showcases how a different tool can be used to solve the same fundamental problem: ensuring the unyielding union of paper and ceramic.
Secret #2: The Unwavering Quest for Perfect Pressure
If securement is the act of preventing the paper from sliding across the surface, then pressure is the act of preventing it from lifting away from the surface. These two forces work in concert. Perfect securement with inadequate pressure can still lead to failure. The application of pressure in a mug press is not merely a clamping force; it is a catalyst. It ensures the intimate contact required for the efficient and precise transfer of the gaseous dye from the paper into the receptive polymer coating. Any deviation from optimal pressure—too much or too little—introduces a variable that can manifest as a specific type of sublimation ghosting.
Pressure as a Catalyst: Its Role in Gas Transfer
Let us visualize the microscopic landscape at the interface of the paper and the mug’s coating. We have solid dye particles in the paper and a receptive polymer on the mug. When heat is applied, the dye becomes a gas. According to the principles of gas diffusion, this dye-gas will move from an area of high concentration (the paper) to an area of low concentration (the polymer coating). Pressure plays a critical role in facilitating this journey. Firm, even pressure does two things. First, it minimizes the distance the gas molecules have to travel. With the paper pressed tightly against the surface, the path is direct and immediate. Second, it prevents the gas from escaping laterally. It creates a seal, forcing the dye to move in the desired direction: perpendicularly into the coating. If the pressure is too low, a microscopic gap can exist between the paper and the mug. In this gap, the dye gas can spread out before it contacts the polymer, resulting in the fuzzy, feathered edges we identify as pressure ghosting. It is a loss of focus at the molecular level.
Calibrating Your Mug Press: Beyond Manufacturer Settings
Every mug press is slightly different. The wear on the heating blanket, the specific mechanics of the clamp, and even minor manufacturing variances mean that you cannot rely solely on the factory-recommended pressure setting. You must learn to feel and test the pressure for yourself. The goal is “firm” pressure, but what does that mean in a tangible sense? It means the pressure is significant enough to hold the mug securely and ensure contact, but not so extreme that it risks cracking the ceramic or causing the paper to buckle and crease under the force.
A classic and effective method for calibrating pressure is the “paper test,” sometimes called the “dollar bill test.” Here is how to perform it:
- Initial Adjustment: With the press cold and turned off, place an empty mug inside. Adjust the pressure knob until the clamp closes with a firm, solid feel. It should require some effort to close, but not a struggle.
- The Strips Test: Cut a few strips of regular office paper, about 2 cm (0.8 inches) wide. Place the mug back in the press. Before you clamp it fully, insert the paper strips at various points between the mug and the heating element—one at the top, one in the middle, and one at the bottom.
- Clamp and Tug: Now, clamp the press shut. Try to pull out each strip of paper. If a strip slides out easily, the pressure in that area is too low. If you cannot pull a strip out at all (or it tears), the pressure is firm. If it pulls out with significant resistance, the pressure is likely in the correct range.
- Fine-Tuning: Your objective is to have even resistance on all the paper strips. If the top strip is loose but the bottom is tight, your press is applying uneven pressure, which may require maintenance or adjustment. Adjust the main pressure knob and re-test until you achieve a consistent, firm tug across the entire height of the mug. Perform this test on both the left and right sides of the press to ensure the entire heating blanket is applying uniform force.
This calibration process should be a regular part of your maintenance routine, not a one-time setup. It allows you to truly understand your specific machine and dial it in for perfect results.
Diagnosing Pressure-Related Ghosting: The Telltale Signs
Learning to read the imperfections on a failed mug is a skill that separates the amateur from the professional. Pressure-related ghosting has its own distinct signatures.
Signs of Insufficient Pressure: The most common sign is the aforementioned fuzzy or feathered edge on text and sharp lines. The image may also appear faded or washed out in certain areas. If you notice that one side of your mug (e.g., the side closer to the top edge) is consistently blurry while the other is sharp, it is a classic indicator of uneven pressure. The blurry area corresponds to the location where the paper was not held in firm contact with the surface.
Signs of Excessive Pressure: While less common as a cause for ghosting, too much pressure can create its own problems. It can cause the paper to crease, and along these crease lines, the ink transfer will be inconsistent, creating dark lines or blank spots. In extreme cases, the intense pressure points can cause the ink to “blow out,” creating a mottled appearance similar to moisture ghosting. You might also notice a distinct indentation or line on your transfer paper from the edge of the heating element, a sign that the force is being focused too narrowly. And, of course, the most catastrophic sign of excessive pressure is a cracked mug.
Pressure Considerations for Different Mug Shapes and Sizes
The world of sublimation blanks is wonderfully diverse, extending beyond the standard 11oz or 15oz cylindrical mug. We have latte mugs with their elegant conical shape, travel mugs with their metallic bases, and various other novelties. Each unique geometry presents a new pressure challenge. A standard cylindrical mug press is designed, naturally, for cylinders. When you introduce a tapered latte mug, the pressure dynamics change completely. The heating element, which is flat, will make firm contact at the wider bottom of the mug but may have a significant gap at the narrower top. Forcing a standard press to work with a tapered mug is a recipe for severe pressure ghosting and inconsistent color.
This is where specialized equipment becomes necessary. Tapered mugs require a press with a correspondingly tapered heating element. Alternatively, a convection oven combined with the shrink wrap method is an excellent solution for non-standard shapes. The shrink wrap conforms to any geometry, providing the uniform pressure that a mechanical press cannot. The principle remains the same, but the tool must match the task. Acknowledging this is central to expanding your product offerings without sacrificing quality. It is a recognition that the physics of pressure must be respected, and we must adapt our methods to accommodate the unique form of each object we wish to sublimate.
With years of industry experience, we are dedicated to delivering reliable service and innovative solutions in tazas de cerámica personalizadas. If you want to learn more or place an order, please feel free to contact us.
Secret #3: Conquering the Invisible Enemy: Moisture
We have addressed the mechanical forces of motion and pressure. Now we turn our attention to a chemical saboteur, an invisible enemy that can be present in your materials and your very workspace: water. Moisture, in any form, is the nemesis of a clean sublimation transfer. Its presence introduces a violent, chaotic element into what should be a controlled, gentle process of gaseous diffusion. The battle against moisture-related ghosting is fought on two fronts: preparing your materials and controlling your environment. Learning how to avoid ghosting during sublimation on ceramic mugs requires a vigilant and proactive approach to demystification.
The Chemistry of Moisture Contamination in Sublimation
To understand why moisture is so detrimental, we must consider the temperatures at which we work. Sublimation occurs around 200°C (392°F). The boiling point of water, as we know, is 100°C (212°F). When a mug and transfer paper containing even a small amount of trapped moisture are placed into a hot press, that water is heated far beyond its boiling point almost instantaneously. It flashes into steam, expanding in volume by a factor of nearly 1,700. This is a microscopic explosion.
This violent outgassing of steam does several destructive things at once. First, it can physically push the sublimation paper away from the mug’s surface, creating a gap that leads to pressure ghosting. Second, and more directly, the rushing steam acts like a wind, blowing the newly formed dye-gas away from its intended location. This is what creates the characteristic “blowout” or blurry, watered-down appearance. The dye is smeared and dispersed before it ever has a chance to bond with the polymer. Third, the presence of water vapor can interfere with the chemical bonding process itself, leading to poor color vibrancy and a splotchy, uneven finish. The final result is a flawed print that often has a distinctive blue or brownish haze in the affected areas, a chemical footprint left by the interference of steam.
Pre-Pressing: The Non-Negotiable Step for Mugs and Paper
Given the destructive power of moisture, we must adopt a zero-tolerance policy. The single most effective tactic in this fight is pre-pressing. This is the act of heating your materials before you bring them together for the final transfer. It is a step that is often skipped by those in a hurry, almost always to their eventual regret. It should be considered a non-negotiable part of your workflow.
Pre-pressing the Mug: Ceramic is a porous material. Even if it feels perfectly dry to the touch, it can absorb ambient moisture from the air. To drive this moisture out, place the empty mug into your pre-heated press for about 15-20 seconds. You may even see a faint wisp of steam escape. This brief heating cycle raises the mug’s temperature above the boiling point of water, forcing any trapped moisture to evaporate. After pre-pressing, place the mug on a heat-resistant mat to cool slightly before wrapping it with your design. Do not place it on a cold surface, as this can cause thermal shock and potentially crack the mug.
Pre-pressing the Paper: Sublimation paper is also highly susceptible to absorbing atmospheric humidity. A sheet of paper that feels dry can hold a surprising amount of water. To remove it, you can hover the printed transfer paper near the open heat press for 5-10 seconds. Be careful not to let it touch the heating element. Alternatively, you can place the transfer paper under a flat heat press (used for t-shirts or other flat items) for a few seconds, with a protective sheet over it. The goal is simply to warm the paper and drive off any residual moisture before you wrap it around the pre-pressed mug. By ensuring both components are completely dry, you eliminate the fuel for the destructive steam explosion.
Environmental Humidity: Your Workshop’s Silent Saboteur
While pre-pressing is an effective immediate solution, a long-term strategy involves controlling the ambient humidity of your production environment. If your workshop is located in a damp basement or a humid climate, your materials are constantly fighting a losing battle, re-absorbing moisture from the air as quickly as you can drive it out. A high-humidity environment is a silent saboteur, consistently compromising your results. According to research on the stability of inkjet inks, environmental factors like humidity play a significant role in the physical properties of the print media (J. S. Arney et al., 1998). While this study focuses on ink fading, the principle of humidity affecting the paper’s properties is directly applicable to sublimation.
Investing in a good quality dehumidifier for your printing and pressing area is one of the best long-term investments you can make for quality control. Aim to maintain a stable, low relative humidity, ideally between 35% and 45%. This creates an environment where your paper and mugs remain naturally drier. Proper storage is also vital. Keep your sublimation paper in its original packaging, often a resealable plastic bag, until you are ready to print. Store your boxes of blank mugs off the floor in a dry, climate-controlled area. By managing your macro-environment, you make the micro-task of pre-pressing far more effective and reliable.
Detecting Hidden Moisture: Signs Your Materials Are Compromised
Beyond the final, flawed print, there are subtle clues that can warn you of a moisture problem before you even press the mug. One of the most common signs is with the sublimation paper itself. If you notice that your paper is curling excessively after printing, it is often a sign that it has absorbed moisture. The ink, which is water-based, is absorbed into one side of the paper, causing it to expand and curl as it dries. While some minor curling is normal, excessive, tight curling is a red flag.
Another sign can be seen during the pre-press stage. If you pre-press a mug and see a significant, visible plume of steam, it is an indicator of high moisture content. While a tiny, almost invisible wisp is normal, a noticeable cloud of steam tells you that your mugs are storing a lot of water and that your environmental controls may need to be addressed. Learning to spot these early warnings allows you to be extra vigilant with your pre-pressing protocol and can save you the cost and frustration of a ruined mug.
Secret #4: The Symphony of Time and Temperature
We now arrive at the very heart of the sublimation process: the delicate interplay of time and temperature. This is not a simple matter of setting the dials and walking away. It is a dynamic process that requires an understanding of thermal physics and a willingness to test and adapt. The correct combination of time and temperature is what orchestrates the entire transformation, from activating the polymer coating to converting the solid dye into a gas. An error in either direction—too hot, too cold, too long, too short—will break the harmony, resulting not only in ghosting but also in a host of other color and quality issues. Achieving mastery here is about finding the “sweet spot” for your specific combination of equipment and materials.
The Thermal Dynamics of Ceramic: How Mugs Absorb and Retain Heat
A ceramic mug is a thermal mass. It does not heat up instantaneously. When you place a room-temperature mug into a hot press, the mug begins to absorb thermal energy from the heating element. This takes time. The outer surface heats first, and the heat gradually penetrates through the ceramic wall to the inside. This is why the overall time in the press is so important; we need to allow enough time for the entire mug, and specifically the entire polymer-coated surface, to reach the target sublimation temperature. If you pull the mug too early, parts of the surface may not have become hot enough to fully sublimate the dye, leading to faded or incomplete transfers. This is under-pressing.
Conversely, ceramic also retains heat. When you remove the mug from the press, it is still intensely hot, and the sublimation process does not stop instantly. This retained heat is a factor we must manage during the cooling phase, which we will discuss in the next section. The thickness and density of the mug also play a role. A thick, heavy 15oz mug has a greater thermal mass than a thinner, lighter 11oz mug. It will require more time and/or a slightly higher temperature to become fully saturated with heat. This is why a single time/temperature setting cannot be a one-size-fits-all solution. You must account for the physical properties of the object you are heating.
Finding the Sweet Spot: A Scientific Approach to Time/Temp Settings
Manufacturers of presses, paper, and mugs will all provide recommended starting points for time and temperature. A common recommendation for ceramic mugs is around 190-200°C (375-392°F) for 180-240 seconds. These are excellent starting points, but they are not gospel. Your mission is to find the perfect setting for your setup. This requires a systematic, scientific approach.
The best method is to perform a test run using a “temperature tower” or a series of test mugs. Create a simple test design with a range of colors, including a solid black, some vibrant primary colors, and a grayscale gradient. Then, using the manufacturer’s recommendation as a baseline, press a series of mugs, changing only one variable at a time.
- Test for Temperature: Set the time to a constant (e.g., 210 seconds). Press the first mug at 185°C, the second at 190°C, the third at 195°C, and the fourth at 200°C. Label each mug carefully.
- Test for Time: Once you have identified the best temperature from the first test (the one with the most vibrant, accurate colors), set the temperature to that constant. Now, press a series of mugs at different times: 180 seconds, 200 seconds, 220 seconds, 240 seconds.
- Analyze the Results: Carefully examine all your test mugs in good, neutral lighting. Look for the mug that has the deepest, richest black (a common indicator of full sublimation), the most vibrant colors, and the sharpest details. The settings used for that mug are your “golden” settings. Keep a detailed log of these tests. This methodical process removes the guesswork and empowers you with data-driven confidence.
The Dangers of Over-Pressing vs. Under-Pressing: A Tale of Two Failures
The results of incorrect time and temperature settings are distinct and teach us much about the process.
Under-Pressing (Too Little Time / Too Low Temp): This is a failure of completion. The dye did not have enough thermal energy or time to fully sublimate and transfer. The resulting image will look faded, washed-out, and lacking in vibrancy. Blacks will appear brownish or gray. You may see a mottled or grainy texture, as only some of the dye particles successfully made the journey. It is an unfinished symphony.
Over-Pressing (Too Much Time / Too High Temp): This is a failure of excess. With too much heat or time, the dye can begin to “bleed” or spread within the polymer coating after it has been transferred, causing fine lines to blur and colors to lose their definition. In extreme cases, the colors can actually begin to shift, with yellows turning greenish and the entire image taking on a brownish, scorched appearance. The polymer coating itself can begin to yellow or degrade under excessive heat. This is a process pushed beyond its optimal point, leading to degradation and a loss of clarity.
Ghosting can be a symptom of both. In an under-pressed mug, if the paper shifts upon removal, the partially sublimated dye can easily smear. In an over-pressed mug, the extended time in a gaseous state gives the dye more opportunity to migrate if there is any instability, leading to a hazy, blown-out form of ghosting.
Adjusting for Variables: Ambient Temperature, Mug Thickness, and Press Efficiency
Your “golden” settings are not static forever. They are a baseline that may need slight adjustments based on changing conditions. Think of it like baking a cake; a recipe might need slight changes depending on your oven’s quirks or the humidity in the air.
Ambient Temperature: A mug press in a cold garage in winter will perform differently than one in a warm workshop in summer. The press has to work harder to maintain its temperature in a cold environment, and the mugs themselves start at a lower temperature. You might find you need to add 10-15 seconds to your press time on very cold days to achieve the same results.
Mug Thickness and Type: As mentioned, a thicker 15oz mug requires more time than an 11oz mug. A stainless steel travel mug, being a metal, conducts heat much more efficiently than ceramic and will require completely different (usually shorter) time and temperature settings. Always perform a new set of tests when you introduce a new type of blank into your production line.
Press Efficiency: As a heat press ages, its heating element can lose some of its efficiency. A press that is five years old may not heat as evenly or hold its temperature as accurately as a brand-new one. If you start to notice a decline in quality with settings that used to work perfectly, it may be time to re-calibrate and potentially increase your time or temperature slightly to compensate for the aging element. Regular calibration and testing is the key to long-term consistency.
Secret #5: The Post-Press Ritual: A Cooling Process of Precision
The moment the timer on the heat press beeps is not the end of the process. In many ways, it is the most critical moment of all. The mug is at its maximum temperature, the polymer coating is fully open and receptive, and the dye is still in a highly active, partially gaseous state. How you handle the mug in the first 30 seconds after it leaves the press will determine whether you achieve a crystal-clear image or a blurry, ghosted failure. This post-press ritual is a discipline of controlled cooling, designed to halt the sublimation process cleanly and swiftly.
The Critical Moment: Why the Cooling Phase is as Important as the Heating Phase
Let us revisit the science. Sublimation is a reversible process, governed by temperature. As long as the mug’s surface remains above the critical temperature (roughly 150°C or 300°F), the dye can continue to move and migrate within the polymer. The process of the dye solidifying and becoming permanently trapped is not instantaneous. It happens during cooling. Therefore, any movement of the transfer paper while the mug is still in this super-heated, receptive state will cause ghosting. This is why a clumsy or rushed removal from the press is one of the most common causes of smeared images. The paper slides against the surface, and the still-active dye is dragged along with it, creating a classic motion ghost. Our objective during the cooling phase is twofold: to remove the paper cleanly without any sliding motion, and to cool the mug in a way that “locks in” the design as quickly and sharply as possible.
The “Gassing Out” Phenomenon: Preventing Post-Press Dye Migration
Even if you remove the mug from the press perfectly, there is another subtle phenomenon at play: “gassing out” or “post-press migration.” The transfer paper itself is still intensely hot and saturated with dye-gas. If you simply peel the paper off and leave it sitting on your workbench next to the mug, the hot paper can continue to release dye-gas into the air. If the mug is also sitting nearby and is still hot and receptive, it can actually absorb this ambient, uncontrolled dye-gas, creating a faint, hazy ghost image around the primary design. This is particularly noticeable with dark colors like black. You might have a perfectly sharp image, but the white space around it has a faint, shadowy tint. To prevent this, the paper must be removed and separated from the mug’s vicinity immediately after removal from the press.
To Dunk or Not to Dunk? Debunking Myths About Rapid Cooling
A common practice seen in many online tutorials is to immediately dunk the hot mug into a bucket of room-temperature or cool water. The logic seems sound: it will rapidly cool the mug, instantly stopping the sublimation process. While this can be effective, it is a high-risk maneuver. The extreme and sudden change in temperature creates immense thermal shock on the ceramic. This can lead to microscopic (or even catastrophic) fractures in the mug’s structure or its polymer coating, compromising its long-term durability. While some high-quality mugs may withstand this treatment, it is generally an unnecessary risk. A controlled, slightly slower cooling process in the open air is far safer and equally effective at preventing ghosting, without jeopardizing the integrity of the product.
A better approach is to use a fan. Placing the mug in front of a small, gentle fan can significantly accelerate the cooling process without the violent shock of a water bath. This provides a happy medium: rapid enough to lock in the design sharply, but gentle enough to avoid damaging the mug.
A Controlled Cooling Protocol for Crystal-Clear Results
To synthesize these points, here is a step-by-step protocol for a safe and effective post-press cooling ritual. This discipline, practiced every time, is a cornerstone of learning how to avoid ghosting during sublimation on ceramic mugs.
- Prepare Your Landing Zone: Before the timer goes off, have your cooling area ready. This should be a heat-resistant surface (like a silicone mat) a few feet away from your press. Have a pair of high-quality heat-resistant gloves on.
- The Swift, Stable Removal: When the timer beeps, open the press. Using your gloves, grasp the mug firmly by its handle or its body. Lift it straight up and out of the press. Avoid any twisting or sliding motions. Move it directly to your prepared landing zone. The entire movement should be deliberate and stable.
- The Peel and Separate: This is the most crucial action. You must remove the paper as quickly and cleanly as possible. The best technique is often a “snap” or “peel” in one continuous, fluid motion. Do not slowly pull or slide the paper off. Pick a corner of the tape or paper and peel it back decisively. As soon as the paper is off, move it away from the mug immediately. Toss it into a designated bin away from your cooling station to prevent any gassing-out contamination.
- Air Cooling or Fan-Assisted Cooling: Let the mug cool naturally on the heat-resistant mat. Ensure it is in an area free from strong drafts, which could cause uneven cooling. If you desire faster cooling, place it in front of a small fan. Do not handle the mug with your bare hands until it has cooled completely, which can take several minutes. The surface may seem cool before the core is, and touching it too soon can still cause a faint fingerprint ghost.
By transforming the removal and cooling from a rushed afterthought into a precise and deliberate ritual, you close the final window of opportunity for ghosting to occur, ensuring the sharp, vibrant image you worked so hard to create is the one that is permanently preserved.
Secret #6: The Foundation of Quality: Choosing Superior Consumables
Thus far, our inquiry has centered on process: the techniques of securement, the calibration of pressure, the management of the physical and chemical environment. However, even the most perfected process is fundamentally limited by the quality of the raw materials upon which it acts. A master chef cannot create a gourmet meal from spoiled ingredients. Similarly, in sublimation, the quality of your blank mugs, your paper, and your inks forms the very foundation of your final product. Attempting to save a few cents on inferior consumables is a false economy that inevitably leads to higher failure rates, inconsistent results, and the persistent frustration of issues like ghosting. A commitment to quality in your supplies is a commitment to predictability and excellence in your outcomes.
Not All Mugs Are Created Equal: The Anatomy of a High-Quality Sublimation Blank
The term “sublimation mug” can be deceptively simple. In reality, there is a vast spectrum of quality. A superior sublimation blank is a piece of precision manufacturing. The first element is the ceramic itself. It should be free from pits, bumps, and other surface imperfections. Any flaw in the underlying ceramic will be visible through the final print. The shape should be consistent, with straight walls and a uniform diameter, which is vital for achieving even pressure in a mug press.
More importantly, we must consider the polymer coating, the true heart of the mug. On a high-quality mug, this coating is applied with exceptional uniformity. It has a consistent thickness across the entire surface, from the top edge to the bottom. This ensures that every part of your design sublimates with the same vibrancy and depth. On a cheap, poorly made mug, the coating can be uneven—thicker in some spots, thinner in others. This results in a blotchy, inconsistent transfer, where some areas appear vibrant and others look faded. This inconsistency can also contribute to ghosting, as different areas may react differently to the heat and pressure profile. Making a commitment to sourcing from a provider who understands these nuances is paramount. For instance, a company with a decade of experience in manufacturing, like the one detailed in our company’s history, prioritizes this level of quality control, ensuring each mug provides a perfect canvas.
The Role of Sublimation Paper: Release Characteristics and Ink Capacity
Sublimation paper is not just paper; it is a highly engineered transfer medium. Its job is twofold: first, to accurately hold the droplets of ink from your printer without excessive bleeding, allowing for a sharp printed image. Second, and more critically, it must release as much of that ink as possible in its gaseous form when heated. This property is known as the “ink release rate.”
High-quality sublimation papers have a specialized coating that facilitates a very high ink release—often 95% or more. This means more of your expensive ink makes it onto the final product, resulting in richer, more vibrant, and more saturated colors. Cheaper papers may have a lower release rate, leaving more ink behind on the paper. This not only wastes ink but also results in a less impactful final image. Furthermore, the paper’s ability to handle ink saturation is key. A good paper allows you to lay down a heavy layer of ink for deep blacks without the paper becoming overly saturated and prone to smearing or causing ink to pool and mottle during the press. The paper’s stability, its resistance to curling from moisture, and its ability to lie flat are all characteristics of a quality product that contribute to a smoother, more reliable workflow and a lower chance of process-induced ghosting.
Ink Matters: The Difference Between High-Quality and Subpar Sublimation Inks
The sublimation ink itself is a complex chemical formulation. High-quality inks, such as those from reputable brands designed specifically for your printer model, are engineered for consistency and purity. The dye particles are ground to a uniform, microscopic size, which prevents print head clogs and ensures a smooth, even spray from the printer. This translates to sharper, cleaner source images on your paper.
The color fidelity of quality inks is also superior. They are designed to work with specific ICC profiles—data files that tell your printer how to translate the colors on your screen into the correct mixture of inks to achieve an accurate final color after pressing. Using off-brand inks without a proper profile is a gamble; your reds may come out orange, your blues may shift to purple. Most importantly, high-quality inks are formulated for optimal gas conversion at standard sublimation temperatures. Subpar inks may contain impurities or have inconsistent dye particle sizes, which can lead to uneven sublimation, poor color vibrancy, and a higher likelihood of strange color shifts or blotchiness that can be mistaken for other issues. Investing in a quality ink system from a trusted supplier like TopSub is not an expense; it is an investment in the final color and clarity of every single product you create.
Secret #7: Cultivating a Meticulous Workflow and Environment
The final secret is perhaps the most profound, for it transcends any single technique or material. It is the cultivation of a professional mindset, embodied in a meticulous, repeatable workflow and an optimized production environment. Inconsistencies in results often stem from inconsistencies in process. By establishing a standardized, disciplined approach, you move from reactive troubleshooting to proactive quality control. This is the path from being a hobbyist who occasionally gets a good result to a professional who can produce excellence on demand. This discipline is the final, essential ingredient in learning how to avoid ghosting during sublimation on ceramic mugs.
The Principle of “Mise en Place” for Sublimation
In the world of professional cooking, there is a French term, “mise en place,” which means “everything in its place.” It is the practice of preparing and organizing all your ingredients and tools before you begin the act of cooking. This philosophy is directly applicable to sublimation. Before you even turn on your heat press, you should have everything you need laid out and ready: your printed and trimmed transfers, a stack of blank mugs within reach, your heat tape cut into strips, your heat-resistant gloves and cooling mat at the ready. This organized approach prevents rushing. Rushing leads to mistakes—a poorly wrapped mug, a forgotten pre-press, a clumsy removal from the press. By creating a calm, organized workspace, you create the mental space to focus on each step of the process with care and deliberation. You are no longer reacting to the beep of the timer; you are executing a well-rehearsed procedure.
Maintaining Your Equipment: The Long-Term Strategy for Consistency
Your heat press is the engine of your production. Like any engine, it requires regular maintenance to perform at its peak. Over time, the silicone wrap on a mug press can wear down, developing thin spots or cracks that lead to uneven pressure. The heating element itself can degrade, leading to cold spots. The digital temperature controller can drift from its calibrated setting. A commitment to consistency requires a commitment to maintenance.
Establish a regular schedule for inspection and cleaning. After each session, wipe down the press (when cool) to remove any ink residue or dust. Once a month, perform a full pressure calibration using the paper strip method described earlier. Use an independent temperature probe (an infrared thermometer or a thermocouple) to verify that the temperature displayed on your controller matches the actual temperature of the heating element. Catching a “cold spot” of 10 degrees in your heating element can be the key to solving a mysterious case of faded prints on one side of your mugs. This preventative maintenance is not a chore; it is a strategy for ensuring that your most important piece of equipment remains a reliable and consistent partner in production.
Creating a Standard Operating Procedure (SOP) for Your Team
If you work alone, your SOP might be a simple checklist that you follow for every batch of mugs. If you have a team, a formal SOP is indispensable for ensuring that everyone produces work of the same quality. An SOP is a written document that details every step of the process, from preparing the artwork to packaging the final product. It should specify: The exact time and temperature settings for different types of mugs. The requirement to pre-press every mug and piece of paper. A diagram showing the correct taping technique. The step-by-step protocol for removal and cooling. Quality control checkpoints (e.g., “Reject any mug with visible ghosting or color bleed”).
An SOP eliminates ambiguity and personal preference. It ensures that “the way we do things” is the way that produces the best results, every single time, regardless of who is operating the press. It transforms tribal knowledge into a documented, trainable, and scalable process. Troubleshooting with a Logbook: Learning from Every Imperfection Even with the best processes, failures will occasionally happen. A professional treats these failures not as frustrations, but as learning opportunities. Keep a logbook near your press. When a mug fails, do not just throw it away. Record the failure. Note the date, the type of mug, the time/temp settings used, and a detailed description of the flaw. Was it motion ghosting? Pressure ghosting along the top edge? A brownish scorch? Take a photo if you can. Over time, this logbook becomes an invaluable database. You might notice a pattern: “Every time we use this specific brand of paper, we see a slight yellowing.” Or, “Pressure ghosting seems to happen more on cold mornings.” This data allows you to move beyond guessing and start making informed adjustments to your process, materials, or environment. Each imperfect mug becomes a lesson, a piece of data that makes your future work better. It is the embodiment of a commitment to continuous improvement, the final and most powerful secret to achieving consistent, flawless sublimation prints. Frequently Asked Questions (FAQ) Why is my sublimation print blurry only around the edges of the design? This is a classic sign of “pressure ghosting.” It indicates that the pressure of your mug press is insufficient or uneven. The edges of the transfer paper are likely lifting or fluttering slightly during the heating process, allowing the gaseous dye to escape and blur. Re-calibrate your press for firmer, more uniform pressure using the paper strip test, and ensure your taping technique securely fastens the edges of the paper to the mug. Can I reuse sublimation paper or heat tape to save on costs? It is strongly advised against reusing either. Sublimation paper is designed for a single use; after pressing, the vast majority of its ink has been transferred, and the paper’s coating is degraded. Reusing it will result in a very faint, “ghost” image of the original design. High-temperature tape loses much of its adhesive strength after one heat cycle and is likely to fail if reused, leading directly to motion ghosting. Investing in fresh consumables for every press is a key part of ensuring quality. What causes a blue, brown, or yellow tint on the white areas of my mugs after pressing? This is typically caused by one of two issues. A blueish or brownish, often splotchy, tint is a hallmark of moisture contamination. The water turns to steam and interferes with the transfer, leaving a discolored residue. Ensure you are pre-pressing both your mug and paper thoroughly. A uniform yellow or brownish tint across the entire mug is often a sign of over-pressing—either the temperature is too high or the time is too long, causing the polymer coating itself to scorch or degrade. Re-evaluate and test your time and temperature settings. How tight should the sublimation paper be wrapped around the mug? The paper should be wrapped “snugly” or “taut.” It should lie perfectly flat against the mug’s surface with no ripples, creases, or air gaps. You should pull it tight enough that it conforms to the mug’s shape, but not so tight that you risk tearing the paper when you apply tape. The goal is intimate contact between the paper and the entire surface of the mug to ensure a direct and focused transfer of dye. Is it really necessary to pre-press a ceramic mug every single time? Yes, absolutely. It should be considered a mandatory, non-negotiable step in your workflow. Ceramic is porous and naturally absorbs humidity from the air, even if it feels completely dry. Skipping the pre-press introduces the risk of moisture ghosting on every single mug. A quick 15-20 second pre-press is a small investment of time that provides crucial insurance against a very common and costly mode of failure. What is the ideal humidity level for a sublimation workshop? For optimal results and material stability, you should aim to maintain a relative humidity level between 35% and 45%. Levels above 50-55% will cause your paper and mugs to absorb excess moisture from the air, increasing the likelihood of moisture-related printing issues. Using a dehumidifier to maintain a stable, dry environment is a wise long-term investment in quality control. Can I fix a mug that already has ghosting on it? Unfortunately, no. The sublimation process is permanent. The dye becomes part of the polymer coating, so the ghosted image cannot be washed off, polished out, or otherwise removed. You cannot sublimate over it, as this would just create a muddled mess of both images. A mug with ghosting is a loss, which is why focusing on a preventative, meticulous process is so vital to avoid wasting time, materials, and money. Conclusion The journey to master the art of sublimation on ceramic mugs is, in essence, a pursuit of control. The spectral image of a ghosted print is not a random misfortune but a physical record of a loss of that control—a moment of unwanted movement, a pocket of uneven pressure, a microscopic explosion of steam. As we have explored, the strategy for how to avoid ghosting during sublimation on ceramic mugs is not a single trick, but a holistic discipline built upon a deep understanding of the scientific principles at play. It requires the precision of a surgeon in securing the transfer, the calibrated force of an engineer in applying pressure, and the vigilance of a chemist in banishing moisture. This discipline extends to a reverence for the symphony of time and temperature, and the crucial, often-overlooked ritual of a controlled cooling process. It is founded upon the wisdom of choosing superior materials, recognizing that the quality of the canvas and the pigment fundamentally dictates the potential of the final artwork. Ultimately, all these elements are bound together by the cultivation of a meticulous workflow, transforming a series of steps into a reliable and repeatable process that generates excellence by design, not by chance. By embracing this comprehensive approach, the frustrating specter of ghosting is demystified and defeated, paving the way for the consistent creation of brilliantly sharp, vibrant, and flawless sublimated products. References
- Sproat, R. (2019). The chemistry of sublimation. In K. L. Johnson (Ed.),Advances in Printing Technology* (pp. 112-134). PrintTech Publishing.
- Ujiie, H. (2015). Digital printing of textiles. Woodhead Publishing. https://www.sciencedirect.com/book/9780857097561/digital-printing-of-textiles
- Arney, J. S., & Chan, T. W. (1998). A study of the effects of temperature and humidity on the fading of ink-jet colorants.
- Journal of Imaging Science and Technology, 42(6), 549-552. Field, G. G. (2012). Color and its reproduction (3rd ed.).
- GATFPress. International Organization for Standardization. (2017). ISO 18930:2017 Imaging materials — Dye-sublimation prints — Methods for measuring permanence and durability. ISO. https://www.iso.org/standard/70743.html Nakamura, T. (2005).
- Thermal dye transfer printing technology. Journal of Imaging Science and Technology, 49(4), 335-344. Sawgrass Technologies, Inc. (2022).
- Troubleshooting common sublimation problems. Sawgrass Ink. https://www.sawgrassink.com/support/troubleshooting