

 German
  English
  Spanish
  Russian
  Arabic
  Italian
  Portuguese
  French
  Greek
Greek  Polish
  Swedish
 This article provides a comprehensive and systematic framework for assessing the quality of ceramic mugs intended for dye-sublimation printing. The quality of the blank substrate is a determining factor in the final product’s aesthetic appeal, durability, and commercial value. Poor quality blanks can lead to significant losses in materials, time, and customer trust. This examination delineates a seven-point evaluation protocol, moving from initial sensory inspections to rigorous performance and durability trials. It explores the critical role of the polymer coating, analyzing its chemical composition, application uniformity, and adhesion properties as they relate to ink reception and color vibrancy. Further, the manuscript investigates the importance of dimensional consistency for automated and manual printing processes, the nuances of ceramic material grades, and their impact on heat retention and structural integrity. The methodology presented includes practical tests, such as controlled test prints to evaluate color fidelity and image sharpness, alongside durability assessments like dishwasher and microwave trials. The objective is to equip professional printers and hobbyists with the knowledge to reliably distinguish superior sublimation blanks, thereby ensuring consistent, high-quality output and fostering a sustainable business practice built on product excellence. A thorough understanding of how to test the quality of sublimation ceramic mugs is presented as a non-negotiable cornerstone of the craft.
Key Takeaways
- A flawless surface, free of pits and bumps, is foundational for a perfect print.
- The polymer coating’s quality directly dictates the vibrancy and sharpness of your design.
- Uniform mug dimensions ensure consistent results and prevent pressing issues.
- A standardized test print reveals how a mug handles colors, gradients, and details.
- Learn how to test the quality of sublimation ceramic mugs through durability trials like dishwasher cycles.
- Knowing the ceramic grade helps predict the mug’s longevity and heat handling.
- Consistent quality relies on a trustworthy supplier with strong batch control.
Table of Contents
- The Initial Visual and Tactile Inspection: Your First Line of Defense
- Evaluating the Sublimation Coating: The Heart of the Mug
- Dimensional Accuracy and Consistency: The Unsung Hero of Production
- The Practical Sublimation Test Print: Where Theory Meets Reality
- Durability and Longevity Testing: Beyond the Initial Print
- Understanding the Ceramic Grade and Composition: The Mug’s Skeleton
- Supplier Assessment and Batch Consistency: Building a Foundation of Trust
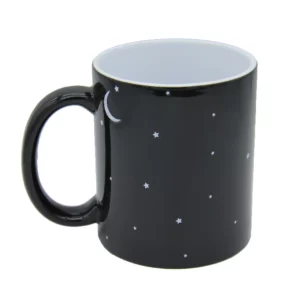
The Initial Visual and Tactile Inspection: Your First Line of Defense
Before any heat press is warmed or a single drop of ink is vaporized, the journey to a stunning sublimated mug begins with a simple, yet profoundly important, act of observation. It is a moment of quiet assessment, a dialogue between your senses and the raw material. To the untrained eye, a box of blank mugs represents a uniform collection of potential. But to the seasoned professional, it is a landscape of subtle variations, where tiny imperfections can forecast significant problems down the line. This initial inspection is not merely a cursory glance; it is a meticulous examination that serves as your first and most crucial line of defense against wasted resources and disappointing results. It is here that you begin to truly understand the character of the product you are working with. The capacity to discern quality at this stage is a skill that separates the amateur from the artisan, transforming the production process from a game of chance into an exercise in controlled excellence.
Assessing Surface Uniformity and Blemish Detection
Let us begin with the surface, the canvas upon which your art will live. Hold the mug up to a good light source, ideally one that is bright and diffuse. Natural daylight from a window is excellent, but a well-lit workbench will suffice. Tilt the mug slowly, rotating it in your hands and allowing the light to play across its entire surface. What are you looking for? You are searching for interruptions in the smoothness, for any blemish that mars the otherwise pristine white landscape. These can manifest in several forms. You might see small, dark specks, often referred to as “pepper spots,” which are typically iron particles or other contaminants that were not filtered from the ceramic clay before firing. While a single, minuscule dot might be acceptable for a low-cost promotional item, a cluster of them or a single large one can ruin a photograph-based design. These specks are not merely on the surface; they are embedded within the ceramic body itself, and no amount of cleaning will remove them. They become a permanent, unwelcome part of your final product.
Next, look for bumps or raised areas. These are often caused by air bubbles or foreign particles trapped under the glaze during the firing process. Run your fingertips lightly over the entire surface of the mug. Your sense of touch is often more sensitive than your sight in detecting these subtle elevations. A bump, no matter how small, creates a tiny mountain on the printing surface. When the mug is placed in the heat press, the sublimation paper cannot make perfect, uniform contact in that area. The pressure will be concentrated on the peak of the bump, while the area immediately surrounding it forms a tiny valley where pressure is reduced. This results in an inconsistent transfer of ink. The outcome is a small, blurry, or faded spot in your final design, an infuriating imperfection that draws the eye and screams of low quality. Conversely, you must also search for pits or divots—the inverse of a bump. These tiny craters present the same problem. The paper will bridge over the pit, preventing the vaporized ink from reaching the polymer coating within it, leaving a stark white, unprinted dot in its place. A high-quality mug should feel as smooth as glass across its entire printable area. Any deviation from this tactile perfection is a red flag.
The Importance of a Flawless Ceramic Glaze
The glaze is the mug’s protective, glossy outer layer. It provides the smooth, non-porous surface upon which the sublimation coating is applied. The quality of this glaze is paramount. Continuing your visual inspection under good light, look for inconsistencies in the glaze itself. Are there areas that appear duller than others? This can indicate an uneven application or improper firing temperature, which can affect how the subsequent polymer coating adheres. Look for “crazing,” a network of fine cracks in the glaze that resembles a spiderweb. This is a serious defect caused by a mismatch in the thermal expansion rates of the ceramic body and the glaze. While it might be invisible at first, the stress of the heat press process can cause these cracks to become more prominent, or worse, they can trap sublimated ink, creating a blurry, web-like pattern within your design. Crazing also compromises the structural integrity and food safety of the mug over time, as the cracks can harbor bacteria.
Another glaze-related issue to watch for is “pinholes.” These are tiny holes in the glaze, often no larger than the tip of a pin, caused by escaping gases during the firing process. While a pinhole in the glaze might be covered by the sublimation coating, it often translates into a pinhole in the coating as well. As we will discuss in greater detail, a pinhole in the sublimation coating is a guaranteed point of failure in your print. It acts as a tiny escape hatch for the gaseous ink, preventing it from being trapped and bonded to the polymer. The result is a sharp, unprinted dot. When examining a batch of mugs, if you notice more than a rare, isolated pinhole, it suggests a systemic issue in the manufacturer’s glazing or firing process, and the quality of the entire batch should be called into question.
Feeling for Imperfections: Chips, Cracks, and Pits
While the primary printing surface is the main focus, the inspection must extend to the entire mug. Carefully examine the rim, the handle, and the base. The rim is the most common site for small chips. Run your finger gently along the entire circumference of the rim. It should feel perfectly smooth and even. A small chip not only presents a safety hazard to the end-user but also indicates fragility. If a mug chips easily during shipping and handling, it is unlikely to withstand the rigors of daily use. A chip on the rim makes the mug unsellable. Next, inspect the handle. Check where it joins the body of the mug. These joints should be smooth and seamless, with no visible cracks or gaps. A poorly attached handle is a significant point of weakness and can break off during the heat press process or, more dangerously, when the mug is filled with a hot liquid. Give the handle a gentle but firm wiggle. There should be absolutely no movement. Finally, place the mug on a perfectly flat surface, like a piece of glass or a countertop you know to be level. Does it wobble? A wobble indicates an uneven base, a clear sign of poor molding or firing. While a slight wobble might not affect the printing process itself, it speaks volumes about the manufacturer’s attention to detail and overall quality control. A customer will immediately notice a wobbly mug, and it will detract from their perception of the product’s quality. This initial, multi-sensory examination is the foundation of your quality control. It costs nothing but a few moments of your time, yet it can save you immense frustration and expense by weeding out defective blanks before they ever enter your production workflow.
| Defect Type | Visual/Tactile Cue | Common Cause(s) | Impact on Sublimation |
|---|---|---|---|
| Surface Pits/Pinholes | Tiny craters or holes on the mug surface, visible under light and felt with a fingertip. | Gases escaping from the ceramic or glaze during firing; impurities in the clay. | Creates unprinted white dots as ink cannot reach the bottom of the pit. |
| Surface Bumps/Debris | Raised spots on the surface, feels uneven. | Air bubbles or foreign particles (dust, kiln debris) trapped under the glaze. | Prevents even contact with the heat press, causing faded or blurry spots around the bump. |
| Black Specks (“Pepper”) | Small black or brown dots embedded in the ceramic. | Iron or other mineral contaminants in the raw clay mixture. | Permanent cosmetic flaw that shows through the final printed image. |
| Uneven Coating | Visible streaks, drips, or areas with a different sheen. Can feel tacky or rough. | Poor application of the polymer sublimation coating (spraying, dipping). | Results in blotchy, inconsistent colors and faded areas in the print. |
| Glaze Crazing | A fine network of cracks on the surface, like a spiderweb. | Mismatched thermal expansion between the ceramic body and the glaze. | Can trap ink, causing blurry lines; compromises mug integrity under heat. |
| Chips and Cracks | Visible damage, typically on the rim, handle, or base. | Poor handling, shipping damage, or inherent fragility in the ceramic. | Unsellable product; safety hazard. Cannot be used for printing. |
| Wobbly Base | Mug does not sit flat on a level surface. | Deformation during the molding or firing process. | Does not directly affect printing but indicates low overall manufacturing quality. |
Evaluating the Sublimation Coating: The Heart of the Mug
If the ceramic body is the skeleton of the mug, then the sublimation coating is its very heart and soul. It is this microscopically thin, transparent layer of polymer that performs the magic of sublimation. Without it, a ceramic mug is just a mug; the ink would have nothing to bond with, and any attempt at printing would result in a faint, blurry smudge that would wipe away with a single touch. The quality, consistency, and durability of this coating are, therefore, not just important—they are everything. A flawless ceramic body with a poor coating is as useless as a defective one. Evaluating this critical layer requires a shift in perspective, from looking at the macro-structure of the mug to investigating the micro-properties of its surface. It demands a deeper understanding of the chemical process at play and a set of tests designed to reveal the invisible strengths and weaknesses of this essential component. A deep dive into the coating is a necessary step in the comprehensive process of learning how to test the quality of sublimation ceramic mugs.
The Science Behind a High-Quality Polymer Coating
To properly assess the coating, we must first understand what it is and what it does. The sublimation coating is a specially formulated polymer, typically a polyester-based resin, that is applied to the surface of the mug. When subjected to the high heat of a mug press (typically around 180-200°C or 356-392°F), two things happen simultaneously. First, the solid sublimation ink on your transfer paper turns directly into a gas, bypassing the liquid state. Second, the polymer coating on the mug softens and its pores open up, almost like a sponge. This gaseous ink then permeates the surface and gets trapped within the now-receptive polymer. As the mug cools, the polymer hardens again, and its pores close, permanently encapsulating the ink particles within the coating itself. The image is not sitting on top of the mug; it has become an integral part of its surface. This is why true sublimation is so durable.
A high-quality coating must possess several key properties. It needs to have excellent thermal stability to withstand the heat press without degrading, yellowing, or blistering. It must have the right chemical affinity for sublimation dyes to ensure maximum ink reception, leading to vibrant, saturated colors. It also needs exceptional adhesion to the ceramic glaze below, preventing it from peeling or flaking over time. And critically, it must be applied in a perfectly uniform layer. Any variation in thickness will lead to a variation in the amount of ink that can be absorbed, causing visible inconsistencies in the final print. Reputable manufacturers invest heavily in their coating chemistry and application processes, often treating their formulas as closely guarded trade secrets. They understand that this is where much of the value is created.
The “Fingernail Test” and Other Simple Coating Adhesion Checks
While you cannot see the coating itself, you can perform simple physical tests to gauge its presence and adhesion. The most basic is the “fingernail test.” In an inconspicuous area, such as on the very bottom of the mug or just under the handle, try to gently scratch the surface with your fingernail. A properly cured, high-quality coating will be extremely hard and durable. Your nail should glide across the surface without leaving any mark or feeling any “give.” If you can scratch the coating off, or if it feels soft or tacky, it is a sign of a catastrophic failure in the coating formulation or the curing process. A mug that fails this test is completely unusable for sublimation. It guarantees that the printed image will peel, flake, and wash away with minimal use.
Another, slightly more revealing test, involves using a solvent. Take a cotton swab and apply a small amount of a strong solvent like acetone or isopropyl alcohol to an inconspicuous area. Rub gently for a few seconds. A well-cured polyester coating is highly resistant to chemical attack. There should be no visible effect. The surface should remain hard and glossy. If the coating becomes soft, sticky, or starts to dissolve, it indicates an improper cure or a low-quality polymer that lacks chemical resistance. This not only predicts poor print durability but can also raise concerns about the food safety of the mug, as a non-resistant coating could potentially leach chemicals. These simple adhesion and resistance checks are powerful indicators of the coating’s fundamental integrity.
Identifying Uneven Coating Application: Streaks, Drips, and Pinholes
The uniformity of the coating application is just as important as its chemical composition. Even the best polymer formula in the world will produce poor results if it is applied sloppily. Once again, you must rely on a careful visual inspection under good lighting. Hold the mug and tilt it, looking for the reflection of your light source on its surface. As you rotate the mug, the reflection should glide smoothly and without distortion. If you see long, linear distortions or “streaks” in the reflection, it points to an uneven application, likely from a clogged spray nozzle or inconsistent spray pattern during manufacturing. These streaks represent areas where the coating is thicker or thinner than the surrounding surface. When printed, these areas will sublimate differently, resulting in visible bands of lighter or darker color in your final image.
Similarly, look for signs of drips or runs, especially near the top or bottom edges of the mug or around the handle. A drip is a localized area of much thicker coating. This area will absorb more ink, creating a dark, blotchy spot in your print. It is a clear indicator of a poor application process and a lack of quality control. Finally, we return to the issue of pinholes. While they can originate in the ceramic glaze, they are more often a problem with the coating application itself. Dust or air bubbles in the coating line can create these tiny voids. As mentioned before, a pinhole is a fatal flaw for the area it occupies. It creates a perfect, unprinted white dot because there is no polymer present to receive the gaseous ink. While a single, tiny pinhole on one mug might be overlooked, finding several on one mug or finding them consistently across a batch is a sign of a contaminated production environment at the manufacturer and a clear reason to reject the batch. The ideal sublimation surface is a mono-functional plane of polymer, and any deviation from this uniformity is a potential point of failure.
The Role of Coating Thickness and Consistency in Color Vibrancy
The thickness of the polymer coating is a critical variable that directly influences the final quality of the sublimated image, particularly its vibrancy and depth of color. It is a delicate balancing act for the manufacturer. If the coating is too thin, it will not have enough depth to absorb a sufficient amount of ink dye. This results in an image that appears washed-out, faded, or lacking in saturation, especially in dark areas like blacks and deep blues. The black areas may look more like a charcoal gray, lacking the richness and contrast that make a print pop. The capacity of the polymer to hold ink is finite, and a shallow “pool” simply cannot hold enough dye to create a deep color.
Conversely, if the coating is too thick, it can lead to its own set of problems. An excessively thick coating may require longer pressing times or higher temperatures to fully penetrate, which can risk scorching the paper or causing the colors to shift. More commonly, a thick coating can be prone to “image bleed” or blurriness. The gaseous ink has too much room to move laterally within the deep polymer layer before it is locked in place upon cooling. This causes fine lines to lose their sharpness and small text to become difficult to read. The ideal coating is one of a specific, consistent thickness—engineered to be deep enough for maximum color saturation but controlled enough to maintain high-definition detail. While you cannot measure this thickness directly without specialized equipment, you can infer its quality through a standardized test print, which serves as the ultimate arbiter of the coating’s performance. The consistency of this thickness across the entire mug and from one mug to the next is what defines a truly professional-grade sublimation blank.
Dimensional Accuracy and Consistency: The Unsung Hero of Production
In the world of sublimation, we often focus on the glamour of vibrant colors and flawless finishes. We scrutinize surfaces for blemishes and analyze coatings for their chemical prowess. Yet, there is a silent, often-overlooked characteristic that is just as vital to achieving professional, repeatable results: the physical dimensions of the mug. Dimensional accuracy and, even more importantly, consistency from one mug to the next, is the unsung hero of efficient production. For the hobbyist making a single gift, a millimeter’s deviation here or there may be a minor annoyance. But for a business producing dozens or hundreds of mugs, these small variations can cascade into significant problems, causing wasted products, lost time, and immense frustration. It is a matter of mechanical fit and predictable behavior. A heat press is a machine of precise tolerances, and it expects the object placed within it to conform to a consistent shape and size. When the mugs themselves are inconsistent, the entire calibrated process breaks down. Therefore, a thorough evaluation of the mug’s physical form is a non-negotiable step in quality assurance.
Why Uniformity Matters for Heat Press Application
Imagine you have calibrated your mug press perfectly for a specific mug. You have dialed in the exact temperature, the precise time, and the ideal pressure to produce a flawless result. The pressure setting is particularly crucial. It ensures that the sublimation paper is held in firm, uniform contact with the entire surface of the mug. This intimate contact is necessary for the efficient transfer of gaseous ink from the paper to the polymer coating. Now, imagine the next mug you take from the box is slightly wider or narrower in diameter. If it is wider, the pressure applied by the press will be too high. This excessive pressure can squeeze the ink out from under the paper as it sublimates, causing blurry edges and “ghosting.” It can also damage the heating element of your press over time. If the next mug is narrower, the pressure will be too low. The paper will not be held tightly against the surface, creating small air gaps. These gaps act as insulators, preventing heat from reaching the paper effectively and stopping the gaseous ink from transferring properly. The result is faded, uneven, or blotchy patches in your print. Without consistent mug diameter, you would be forced to readjust your press for every single mug, a practice that is not only time-consuming but also nearly impossible to get right every time. Uniformity is the bedrock of scalability and efficiency in production.
Measuring Diameter, Height, and Wall Thickness
To move from subjective assessment to objective data, you need a simple tool: a digital caliper. This inexpensive instrument is indispensable for any serious sublimation business. Start by measuring the diameter of the mugs. Do not just measure one mug from the case; select several at random from different parts of the box to get a representative sample. For each mug, measure the diameter at the top, middle, and bottom. A high-quality mug will have a consistent diameter along its entire height—it will be a true cylinder. A mug that is tapered, wider at the top than the bottom (or vice-versa), is said to have a “draft angle.” While some draft is unavoidable in the molding process, an excessive taper will cause pressure inconsistencies in a standard cylindrical heat press. Record your measurements. In a good batch of mugs, the variation in diameter between mugs should be less than a millimeter, ideally within a few tenths of a millimeter. Any variation greater than that will likely require pressure adjustments.
Next, use the caliper to measure the height of the mugs. Consistency in height is important for aligning your artwork, especially for full-wrap designs. If the height varies from mug to mug, a design that fits perfectly on one may be too short or wrap around the bottom edge on another. Again, measure several mugs and look for tight consistency. Finally, if possible, assess the wall thickness. While harder to measure directly without breaking a mug, you can get a sense of it by feeling the weight and looking at the rim. The wall thickness affects how the mug heats up. A mug with thick walls will take longer to reach the target sublimation temperature than one with thin walls. If the wall thickness is inconsistent across a batch, using a single time and temperature setting for all mugs will yield inconsistent results. Some will be underdeveloped (faded), while others might be over-cooked (colors shifting or browning). A consistent weight from mug to mug is often a good proxy for consistent wall thickness.
Checking for Handle Alignment and Mug Straightness
The final dimensional checks relate to overall geometry. Place the mug on your flat surface again and look at it straight on. Is the handle perfectly vertical? Or is it tilted to one side? A tilted handle is not just a cosmetic flaw; it can complicate the process of aligning your design, especially if you are trying to place an image perfectly opposite the handle. A customer will immediately perceive a crooked handle as a sign of a cheap, poorly made product. Now, look at the body of the mug itself. Do the walls appear straight and parallel? Or does the mug bulge in the middle or have a concave, “waisted” appearance? A good way to check this is to place a straight edge, like a metal ruler, against the side of the mug. It should sit flush against the surface from top to bottom. Any gaps indicate a deviation from a true cylinder. A bulge will create a high-pressure spot in the press, while a concave area will create a low-pressure zone. Both conditions, as we have established, are recipes for a failed print. These geometric properties—straightness, handle alignment, and cylindrical form—are hallmarks of a manufacturer that uses high-quality molds and has a well-controlled firing process. They are the subtle, structural details that enable the artistic process of sublimation to succeed without a hitch.
With years of industry experience, we are dedicated to delivering reliable service and innovative solutions in custom ceramic mugs. If you want to learn more or place an order, please feel free to contact us.
The Practical Sublimation Test Print: Where Theory Meets Reality
All the inspections and measurements we have discussed thus far are, in essence, predictive. They are methods of forecasting success or failure. But the ultimate and undeniable proof of a sublimation mug’s quality lies in its performance under pressure—literally. The practical test print is the crucible where all the variables of ceramic quality, coating integrity, and dimensional accuracy are brought to bear on a single outcome: the final printed image. This is the moment of truth. A mug can look perfect, feel smooth, and measure consistently, but if it cannot receive and display a sublimated image with vibrancy, sharpness, and accuracy, it has failed its fundamental purpose. This test is not something to be done sporadically; it should be a standardized, routine part of your quality control process, especially when evaluating a new supplier or a new batch of mugs from an existing one. It transforms abstract knowledge into tangible results, providing the final, crucial data point in your assessment.
| Ceramic Grade | Key Characteristics | Sublimation Suitability | Profis | Nachteile |
|---|---|---|---|---|
| Earthenware | Porous, opaque, relatively soft. Fired at low temperatures (1000-1150°C). | Poor. Generally not used for sublimation due to high porosity and low durability. | Inexpensive to produce. | Absorbs moisture, chips easily, not dishwasher safe, poor heat distribution. |
| Stoneware | Less porous than earthenware, more durable. Fired at higher temperatures (1200-1300°C). Often has a thicker, heavier feel. | Acceptable to Good. A common material for budget to mid-range sublimation mugs. | Durable, good heat retention, relatively affordable. | Can have color variations (less pure white), may contain specks, can be heavy. |
| Porcelain | Non-porous, strong, translucent. Fired at very high temperatures (1200-1450°C). Made from fine materials like kaolin. | Excellent. Often considered the premium choice for high-quality sublimation. | Very strong and chip-resistant, bright white surface for vibrant colors, excellent heat distribution. | More expensive than stoneware. |
| Bone China | A type of porcelain containing bone ash. Known for its high whiteness, translucency, and strength. | Highest Quality. Provides the best possible canvas for sublimation. | Superior strength and chip resistance, most brilliant white color, lightweight yet durable. | The most expensive option, typically reserved for premium/luxury products. |
Choosing the Right Test Image: Colors, Gradients, and Fine Lines
The first step in a meaningful test is choosing the right diagnostic tool, which in this case is your test image. Printing a simple, single-color logo will not reveal the full capabilities or flaws of a mug. Your test image should be specifically designed to challenge the sublimation process. It should include several key elements. First, a solid block of black. A true, deep black is one of the hardest things to achieve in sublimation. A poor coating or incorrect settings will render black as a muddy brown or charcoal gray. Placing this black block on your test print provides an immediate, clear indicator of the mug’s ability to achieve deep saturation. Second, include a spectrum of primary and secondary colors (red, green, blue, cyan, magenta, yellow). This allows you to check for color accuracy. Does the red look vibrant and true, or does it shift towards orange or pink? Is the blue rich, or is it muted? Third, incorporate a grayscale gradient, moving from pure white to solid black through all the shades of gray. This is an excellent test for the coating’s uniformity. On a poor mug, this smooth gradient will show “banding” or distinct steps in tone, revealing inconsistencies in the surface’s ability to accept varying amounts of ink. Fourth, include fine details. This could be a section of very small text (at different font sizes) or a complex pattern with thin, intersecting lines. This tests the mug’s ability to produce a sharp, high-definition image without bleeding or blurring. Finally, it can be useful to include a skin tone photo patch, as reproducing human skin tones accurately is a common challenge and a good test of the mug’s color fidelity. Using the same standardized test file every time allows you to create a baseline and compare the performance of different mugs objectively.
Standardizing Your Pressing Parameters (Time, Temperature, Pressure)
To conduct a fair test, you must eliminate as many variables as possible. The only thing that should change from one test to the next is the mug itself. This means you must standardize your entire workflow. Use the same printer, the same ink set, and the same sublimation paper for all your tests. Most importantly, you must use consistent settings on your mug press. Choose a standard temperature, time, and pressure based on the recommendations from your ink and paper manufacturer (a common starting point is 200°C for 180 seconds with medium pressure). It is critical that your heat press is of good quality and provides consistent, even heat across its entire heating element. A cheap, low-quality press with hot and cold spots will invalidate your test results, as you will not know if a flaw was caused by the mug or the press. Before running your test, allow the press to come up to temperature and stabilize for several minutes. Apply your test print to the mug, ensuring it is taped securely to prevent shifting. When you press the mug, do so in exactly the same way every time. This scientific rigor is essential. Without it, you are not conducting a test; you are just making mugs with unpredictable results.
Analyzing the Transfer Results: Color Accuracy and Sataturation
Once the pressing is complete and the mug has cooled enough to handle safely, carefully peel back the transfer paper. This is the moment of revelation. The first thing to assess is the color. Compare the colors on the mug to the colors in your original digital file on a color-calibrated monitor. How accurate are they? Look at the solid black patch. Is it a deep, rich black, or is it faded? A strong black indicates that the coating has excellent ink-loading capacity. Look at the color blocks. Are they vibrant and saturated? Do they match the intended hues? A yellowish or brownish cast across the entire image can indicate a low-quality coating that is not thermally stable and has yellowed under the heat. A generally faded or muted appearance suggests a coating that is too thin or has poor ink receptivity. This is a crucial aspect of evaluating the wide array of available ceramic sublimation cups. The ability of the mug to translate digital colors into a physical, vibrant reality is a primary measure of its quality.
Examining Image Sharpness and Detail Retention
Next, shift your focus from color to clarity. Look closely at the areas of your test print with fine lines and small text. Use a magnifying glass if necessary. Are the edges of the text and lines crisp and sharp? Or are they fuzzy and blurred? Blurriness, or “bleeding,” can be caused by several factors, but in a standardized test, it often points to a coating that is too thick, allowing the ink to spread before it sets. Examine the grayscale gradient. Is the transition smooth and continuous? Or can you see distinct lines or bands where the tone changes abruptly? Banding is a tell-tale sign of an uneven coating application. The areas with thicker coating absorb more ink and appear darker, while thinner areas appear lighter, breaking the illusion of a smooth tonal shift. The ability to retain fine detail is the hallmark of a premium sublimation surface. It demonstrates that the polymer coating is engineered not just to absorb color, but to hold it precisely where it was intended.
Identifying Common Print Flaws: Ghosting, Fading, and Blotching
Finally, inspect the entire print for common, localized flaws. “Ghosting” appears as a faint, secondary image slightly offset from the main design. This is often caused by the paper shifting slightly as you open the press or remove the mug, allowing a small amount of still-gaseous ink to redeposit. While often a technique issue, a mug with an uneven surface or a slight taper can make it more difficult to secure the paper perfectly, increasing the likelihood of ghosting. Look for blotchy or uneven patches of color, especially in large, solid areas. This can indicate uneven pressure due to dimensional inconsistencies in the mug, or it can be a result of moisture. A porous, low-quality ceramic can absorb ambient humidity, which then turns to steam in the press and interferes with the sublimation process. A high-quality, vitrified ceramic mug is much less prone to this issue. By systematically working through this analysis—from overall color to fine detail to specific flaws—you can build a complete performance profile of the mug. This practical test provides the definitive answer to the question of quality, moving beyond speculation to hard evidence.
Durability and Longevity Testing: Beyond the Initial Print
A sublimated mug is not a static piece of art to be kept behind glass. It is a functional object, destined for a life of daily use. It will be filled with hot coffee, scrubbed in the sink, and blasted with high-temperature water in a dishwasher. The beauty of a freshly printed mug is fleeting if the image fades, scratches, or peels away after a few weeks of use. Therefore, a comprehensive quality assessment must extend beyond the moment the mug leaves the heat press. It must venture into the realm of durability testing, simulating the stresses and strains of a mug’s life cycle. This stage of evaluation is critical for protecting your brand’s reputation. Selling a product that looks beautiful on day one but degrades quickly is a sure way to create unhappy customers and damage your business. True quality is not just about a vibrant print; it is about a vibrant print that lasts. These longevity tests reveal the true resilience of the sublimation coating and the underlying ceramic, separating the robust, professional-grade products from the disposable imitations.
The Dishwasher Test: Simulating Real-World Use
The single greatest threat to the longevity of a sublimated image is the modern dishwasher. It is a hostile environment, combining high-heat water, prolonged moisture exposure, and harsh, abrasive detergents. A poorly applied or low-quality sublimation coating will quickly succumb to this onslaught. The best way to test this is straightforward: run the mug through the dishwasher. But for the test to be meaningful, it needs to be systematic. Do not just wash it once. A truly durable sublimation mug should be able to withstand dozens, if not hundreds, of wash cycles without any perceptible fading. For a rigorous test, take a few of your successfully test-printed mugs and place them in the top rack of a dishwasher. Run a standard, high-temperature wash cycle. After the cycle is complete, let the mug cool and dry completely, then compare it to an identical “control” mug that has not been washed. Is there any loss of color vibrancy? Is there any fading in the black areas? Is there any change in the glossiness of the surface? Now, repeat the process. Wash it 10 times, 20 times, 50 times. A superior quality mug, like those rated for thousands of cycles by reputable manufacturers, will show virtually no degradation. A lower-quality mug may start to show fading after just a handful of washes. This test directly assesses the chemical and thermal stability of the polymer coating and its adhesion to the ceramic. It is the gold standard for predicting real-world performance and a key component of how to test the quality of sublimation ceramic mugs for commercial sale.
Microwave Safety and Heat Resistance Evaluation
Most customers expect a modern ceramic mug to be microwave-safe. Testing for this is not just about image durability but also about product safety. A key concern is the potential for metallic particles in the ceramic material. If the raw clay used to make the mug has a high concentration of metallic ores, such as iron, it can cause arcing or “sparking” in a microwave. To test this, place a test-printed mug filled with water in the microwave. Heat it for a standard interval, such as 60 or 90 seconds. First, observe for any sparking during the heating process. Any arcing is an immediate failure and indicates the mug is not microwave-safe. After heating, carefully remove the mug. The water should be hot, but the handle should remain cool to the touch. A well-designed mug made from appropriate ceramic materials will insulate the handle from the heat of the body. If the handle becomes excessively hot, it is a design flaw and a potential safety hazard for the user. After the mug has cooled, inspect the sublimated image. The brief but intense heat of the microwave should have no effect on a properly cured sublimation print. Any blistering, fading, or color shifting indicates a coating that is not fully cured or lacks thermal stability. This test confirms both the safety and the resilience of the mug under a different kind of thermal stress than the heat press.
Scratch and Abrasion Resistance of the Coating
A mug’s life involves more than just washing and heating. It involves being stacked with other dishes, stirred with metal spoons, and scrubbed with sponges. The surface must be hard enough to resist scratches and abrasions that would mar the printed image. This property is a direct function of the quality and curing of the polymer coating. A simple but effective way to test this is the “crock meter” or abrasion test, which can be simulated manually. Take a piece of standard white cloth and rub it firmly and repeatedly (e.g., 20 times) over a section of the printed image, particularly a dark-colored area. Inspect the cloth. Is there any color transfer? On a high-quality mug, there should be none. Any color rubbing off onto the cloth indicates a surface that is not fully cured or a coating that has poor cohesion, meaning the ink is not securely locked in. For a more aggressive test, you can use the edge of a coin (like a penny or a dime) and, applying moderate pressure, try to scratch the surface in an inconspicuous printed area. A top-tier sublimation coating is remarkably tough. It should resist scratching from a coin with moderate pressure. If the coin easily gouges the surface and removes the image, the coating lacks the necessary hardness for long-term use. These durability tests complete the picture. They take the mug from a pristine, just-printed state and subject it to the trials of its intended life, ensuring that the quality you create in your workshop is the same quality your customer enjoys for years to come.
Understanding the Ceramic Grade and Composition: The Mug’s Skeleton
Beneath the glossy glaze and the high-tech polymer coating lies the very foundation of the product: the ceramic body itself. While we often treat “ceramic” as a single category, it is, in fact, a wide family of materials with vastly different properties, origins, and performance characteristics. The specific grade of ceramic used to construct a mug has a profound impact on its durability, weight, heat retention, color, and ultimately, its suitability for high-quality sublimation. An educated printer understands that not all ceramic mugs are created equal. Delving into the material science of the mug’s “skeleton” provides a deeper level of understanding and allows for a more informed purchasing decision. It is the difference between simply buying a “white mug” and selecting a specific substrate engineered for optimal performance. This knowledge elevates your craft, enabling you to speak intelligently about your products and to choose blanks that align perfectly with the quality standards of your brand.
Differentiating Ceramic Grades (e.g., Stoneware, Porcelain, Bone China)
The most common grades of ceramic you will encounter in the world of sublimation mugs are stoneware and porcelain, with bone china representing a premium, less common option. Understanding their core differences is key. Stoneware is a dense, strong ceramic fired at high temperatures (around 1200°C). It is less porous than lower-fired ceramics like earthenware and is quite durable. Many standard, everyday sublimation mugs are made from stoneware. It is a reliable and cost-effective workhorse. However, the natural clays used for stoneware often contain small amounts of impurities like iron, which can result in a base color that is slightly off-white or creamy, and can sometimes lead to the “pepper spots” we discussed earlier. Porcelain is a step up in quality. It is made from a more refined and pure clay, most notably kaolin, and is fired at even higher temperatures (up to 1450°C). This process, called vitrification, results in a material that is extremely hard, non-porous, and chip-resistant. Critically for sublimation, porcelain has a brilliant, pure white color, which provides the ideal canvas for making printed colors appear vibrant and true. The whites in your design will be the bright white of the mug itself, not a muted cream. Bone China is a specific type of porcelain that includes bone ash (typically from cattle) in its composition. This makes it the strongest and most chip-resistant of all ceramic types, while also being remarkably lightweight and translucent. Its color is a brilliant, slightly warm white, considered by many to be the ultimate surface for high-end printing. While more expensive, mugs made from porcelain or bone china offer superior durability and color reproduction.
The Impact of Raw Materials on Durability and Heat Retention
The raw materials and the firing process directly dictate two key functional properties of the mug: its durability and its ability to handle heat. The porosity of the ceramic is a major factor. Lower-grade, more porous ceramics like earthenware (which should be avoided for sublimation) can absorb tiny amounts of water over time. When heated rapidly in a heat press or microwave, this trapped moisture can turn to steam and cause stress fractures or even cause the mug to crack. The full vitrification of porcelain and bone china makes them impervious to water absorption, rendering them far more stable and durable under thermal stress. This is why they can be made thinner and lighter than stoneware while retaining superior strength. The material composition also affects heat retention. Denser materials with thicker walls, like stoneware, will typically hold heat longer than a fine-walled porcelain or bone china mug. While this may be a desirable trait for someone drinking hot coffee, it is also a factor to consider in the printing process. A thicker stoneware mug may require a slightly longer pressing time to allow the heat to fully penetrate the ceramic and bring the entire surface up to the target sublimation temperature. Consistency in the raw material batch is crucial. A good manufacturer will have strict controls over their clay and mineral sources to ensure that every mug has the same thermal properties, leading to repeatable printing results.
Looking for Manufacturer Certifications (e.g., FDA, Prop 65)
When you are creating a product that will be used for consuming food and beverages, quality assurance must extend to health and safety. The materials used in the ceramic and the glaze must be free from harmful substances like lead and cadmium. Reputable manufacturers will have their products independently tested to certify that they meet international safety standards. In the United States, the most important certification is from the Food and Drug Administration (FDA). FDA compliance ensures that the mug is safe for food contact. Another important standard, particularly for businesses selling in California, is Proposition 65. This requires businesses to provide warnings about significant exposures to chemicals that cause cancer, birth defects, or other reproductive harm. A mug that is certified as Prop 65 compliant has been tested and found to be free of these listed chemicals. When evaluating a supplier, do not hesitate to ask for their documentation of these certifications. A trustworthy manufacturer will be transparent and readily provide proof of their compliance. The presence of these certifications is a powerful indicator of a company’s commitment to quality and safety. It shows they are not cutting corners by using cheap, potentially hazardous raw materials. Choosing a certified product not only protects your customers but also protects your business from potential liability. It is a fundamental part of a professional and ethical sourcing strategy.
Supplier Assessment and Batch Consistency: Building a Foundation of Trust
Even with the most exhaustive knowledge of how to test an individual mug, your long-term success in the sublimation business hinges on a factor that extends beyond any single product: the quality and reliability of your supplier. You can test a sample mug and find it to be perfect, but that perfection is meaningless if the next case you order is riddled with defects. The ultimate goal is not just to find a good mug, but to find a consistent supply of good mugs. This requires a shift in focus from product testing to partner assessment. A supplier is more than just a vendor; they are a critical partner in your production chain. A great supplier provides not just a product, but also consistency, reliability, and quality control. Building a relationship with the right supplier is one of the most important investments you can make in your business. It is the foundation upon which a stable, scalable, and reputable printing operation is built.
The Value of a Reliable Supplier Relationship
What defines a reliable supplier? It begins with transparency. A good supplier should be able to answer your detailed questions about their products. They should be able to tell you the grade of ceramic they use, provide details about their coating process, and show you their food safety certifications. Companies that are vertically integrated, meaning they control the process from raw ceramic manufacturing to the final coating application, often have a significant advantage in quality control. For example, integrated factory and trade companies can ensure that standards are maintained at every step of production, from mixing the clay to packaging the final product. This eliminates the “blame game” that can happen when one company makes the mug and another applies the coating. A reliable supplier also demonstrates consistency. The samples they provide should be representative of the bulk orders you will receive. They should have robust internal quality control processes to minimize variations from one production batch to the next. Communication is also key. A good partner will inform you of any changes in their product or processes and will work with you to resolve any issues that arise. This kind of relationship is built on trust and mutual respect, and it is far more valuable than simply finding the lowest possible price per mug.
Requesting Samples and Performing Batch Testing
Never commit to a large order from a new supplier without first testing their samples. And do not just ask for one or two mugs. Request a full case, or at least a dozen samples, and offer to pay for them. This shows you are a serious buyer and gives you a much better data set for your evaluation. A single perfect mug could be a hand-picked “golden sample,” but it is much harder to hide systemic issues across a dozen randomly selected units. When you receive the samples, put them through the full 7-point testing protocol we have outlined. Perform the visual and tactile inspections. Measure their dimensions with your calipers. And most importantly, run your standardized test print on several of them. Are the results consistent from mug to mug? Do they all exhibit the same color saturation and sharpness? Once you are satisfied with the samples and place a larger order, your testing is not over. When the first shipment arrives, immediately perform “batch testing.” Pull several mugs at random from different cases and run your tests again. Compare the results to your initial sample tests. Are they the same? This ongoing verification ensures that the quality has not slipped between the sample stage and full production. It keeps your supplier accountable and protects you from being stuck with a large quantity of unusable stock.
Evaluating Packaging for Transit Damage Prevention
A perfect mug that arrives broken is a useless mug. The final, and often overlooked, aspect of supplier assessment is their packaging. A mug is a fragile item, and it must be protected during its long journey from the factory to your workshop. When you receive your sample or bulk order, pay close attention to how it was packed. Are the mugs individually boxed? Is there sufficient cushioning material like foam, cardboard inserts, or bubble wrap? Is the outer carton a sturdy, double-walled cardboard box? A supplier that invests in high-quality, robust packaging understands the value of their product and is committed to delivering it to you intact. Frequent damage in transit is a major red flag. It not only costs you money in lost product but also wastes your time dealing with shipping claims and waiting for replacements. Good packaging is the final step in a manufacturer’s quality control process. It ensures that all the care and precision that went into making the mug is not wasted in the last few miles of its journey. Choosing a supplier who excels in this final detail demonstrates a comprehensive commitment to quality that you can rely on.
FAQ
- What are the small black dots I sometimes see on my blank ceramic mugs?
- These are commonly called “pepper spots” or “iron spots.” They are tiny impurities, usually iron particles, that were present in the raw ceramic clay and were not filtered out before the mug was formed and fired. They are baked into the body of the mug and cannot be removed. While a single, tiny speck may be acceptable, multiple or large spots are a sign of lower-quality raw materials and can ruin a print, especially a photograph.
- Why does my sublimation print look faded or washed out?
- A faded print is most often a problem with the sublimation coating on the mug. It can mean the coating is too thin to absorb enough ink, has poor chemical receptivity to the dyes, or was not applied evenly. Other causes can include incorrect press settings (temperature too low or time too short) or using a mug not specifically designed for sublimation. A high-quality coating is essential for vibrant, saturated colors.
- Can I use any ceramic mug from a regular store for sublimation?
- No, you cannot. Sublimation requires a special polymer coating to work. A standard ceramic mug from a department or dollar store lacks this polyester coating. The sublimation ink needs this specific surface to bond with. If you try to sublimate on a regular mug, the ink will not transfer properly, and any faint image that does appear will wipe or wash off immediately.
- What causes a “ghost” image or blurry edges on my sublimated mug?
- Ghosting (a faint, secondary image) or blurry edges are typically caused by the sublimation paper shifting slightly while the ink is still in its gaseous state. This can happen if the mug is moved when opening the press or if the paper is not taped down securely. It can also be exacerbated by excessive pressure from the heat press or if the mug itself is not perfectly cylindrical, which prevents the paper from sitting perfectly flat against the surface.
- How can I tell if a mug is truly dishwasher safe?
- The only reliable way is to test it. While a manufacturer may claim their mugs are dishwasher safe, the term can be subjective. The best test is to take a printed mug, place it on the top rack of your dishwasher, and run it through multiple (10, 20, 50+) wash cycles using a standard detergent. A high-quality sublimation mug, often rated for hundreds or even thousands of cycles, will show no noticeable fading. A lower-quality mug will begin to lose color and vibrancy much sooner.
- Why is the handle on my mug getting extremely hot in the microwave?
- This is a sign of poor ceramic quality or design. In a well-made mug, the ceramic body absorbs the microwave energy and heats the liquid, but the handle is designed to stay relatively cool. If the handle gets dangerously hot, it may be due to the specific composition of the ceramic absorbing too much microwave energy or having a high metallic content. This is a safety concern and indicates a lower-grade product.
- Is a heavier mug always a better quality mug?
- Not necessarily. While a certain heft can feel like quality, weight is more related to the type of ceramic and its wall thickness. Heavy stoneware mugs can be very durable. However, premium ceramics like porcelain and bone china are often stronger and more chip-resistant while being significantly lighter. Quality is more about the material’s density, vitrification, and lack of flaws than its raw weight.
- What does “A-Grade” or “AAA-Grade” mean when buying sublimation mugs?
- These are marketing terms used by suppliers to denote the quality level of their mugs, but they are not standardized across the industry. Generally, a higher grade (like AAA) implies a mug with the fewest imperfections: a flawless white surface, a uniform and high-performance coating, and consistent dimensions. A lower grade (like B or C) might have minor cosmetic blemishes like pinholes or specks and is sold at a discount. Always test samples yourself, as one company’s “AAA-Grade” might be different from another’s.
Conclusion
The journey through the intricate world of sublimation mug quality reveals a fundamental truth: excellence is not an accident. It is the result of deliberate, informed, and rigorous evaluation. From the initial touch and glance that seeks out the slightest imperfection, through the scientific precision of a standardized test print, and into the demanding trials of real-world durability, each step is a critical part of a holistic quality assurance process. We have seen that a successful sublimation business is built not on ink or paper, but on the foundation of a superior blank substrate. The integrity of the ceramic, the uniformity of its dimensions, and, above all, the performance of its polymer coating are the pillars that support every vibrant, sharp, and lasting print you produce. By internalizing this seven-point checklist, you move beyond being a simple printer to become a true craftsperson and a discerning materials expert. You arm yourself with the knowledge to not only identify quality but to demand it from your suppliers. This commitment to testing and understanding is what ultimately protects your investment, builds your brand’s reputation, and ensures that every product you sell is a testament to your dedication to quality.
References
- Chiang, Y. M., Birnie, D. P., & Kingery, W. D. (1997). Physical ceramics: Principles for ceramic science and engineering. John Wiley & Sons.
- Saha, P. (2018). Ceramics: Properties and applications. Materials and Energy. https://doi.org/10.5772/intechopen.75479
- U.S. Food & Drug Administration. (2022). CFR – Code of Federal Regulations Title 21, Part 175: Indirect food additives: Adhesives and components of coatings. https://www.accessdata.fda.gov/scripts/cdrh/cfdocs/cfcfr/CFRSearch.cfm?CFRPart=175
- Sève, R. (2010). Problems in the colorimetry of translucent materials. Color Research & Application, 35(4), 256–265. https://doi.org/10.1002/col.20583
- California Office of Environmental Health Hazard Assessment (OEHHA). (2024). Proposition 65. https://oehha.ca.gov/proposition-65
- Sawgrass Technologies, Inc. (n.d.). The science of sublimation. Sawgrass Ink.
- Ryan, W., & Radford, C. (1987). Whitewares: Production, testing and quality control. Elsevier. https://www.sciencedirect.com/book/9780080349272/whitewares
- Ceramic Arts Network. (n.d.). Ceramic glaze defects: A glossary of crazing, crawling, and more. https://ceramicartsnetwork.org/daily/ceramic-glaze-recipes/glaze-chemistry/nine-common-ceramic-glaze-defects/