

 Russian
  English
  Spanish
  German
  Arabic
  Italian
  Portuguese
  French
  Greek
Greek  Polish
  Swedish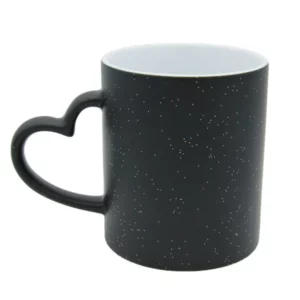
Abstract
This document examines the intricate process of how to customize cups through dye-sublimation, a popular thermal transfer method. It provides a comprehensive framework for both novices and established businesses navigating the choices inherent in this craft. The analysis begins with the foundational decision of selecting an appropriate sublimation blank, exploring the distinct properties of ceramic, glass, and metal substrates. A central point of discussion is the non-negotiable requirement of a polymer coating, which acts as the receptor for the sublimated dye. The guide then proceeds to dissect the creative phase, covering design principles, software selection, and the critical conversion of color profiles for print. It further details the technical execution, from choosing the right printer, inks, and paper to mastering heat application via a mug press or convection oven. The document also addresses common technical challenges, offering diagnostic solutions for issues like image ghosting, color bleeding, and uneven transfers. The exploration extends to opportunities for business expansion through diverse product offerings and OEM/ODM partnerships, positioning cup customization as a viable commercial endeavor.
Key Takeaways
- Select only mugs with a special polymer coating for sublimation to work.
- Mirror your image file before printing it onto sublimation paper.
- Use a quality heat press for consistent temperature and pressure.
- Learning how to customize cups involves mastering time, temperature, pressure.
- Preheat your mug slightly to remove any residual moisture.
- Allow the customized cup to cool completely before handling it.
- For business growth, explore diverse substrates beyond standard mugs.
Table of Contents
- Choice 1: Selecting the Right Sublimation Blank as Your Canvas
- Choice 2: Designing for Sublimation from Concept to Print
- Choice 3: Mastering the Sublimation Printing and Material Nexus
- Choice 4: The Art of Heat Transfer and Applying Your Design
- Choice 5: Troubleshooting Common Issues in Cup Customization
- Beyond Mugs: Expanding Your Sublimation Horizons
- Frequently Asked Questions (FAQ)
- Conclusion
- References
Choice 1: Selecting the Right Sublimation Blank as Your Canvas
The journey into the world of cup customization begins not with a flash of color or a burst of heat, but with a quiet, contemplative choice: the selection of your canvas. In the realm of sublimation, this canvas is called a “blank.” It is the raw material, the substrate, the very foundation upon which your artistic or commercial vision will be built. To choose a blank is to make a statement about durability, aesthetic, feel, purpose. It is a decision that precedes all others, shaping the subsequent steps of the process. Thinking about how to customize cups requires a deep appreciation for the material science at play. The blank is not merely a passive object waiting to be decorated; it is an active participant in the chemical transformation that is sublimation. Its composition, its surface, its very molecular structure will determine the vibrancy, permanence, your final result. Let us, therefore, approach this first choice with the care it deserves, examining the character of each potential medium.
Understanding the “Blank”: The Canvas for Your Creation
Before we can compare materials, we must grasp a universal truth of dye-sublimation: the process works by bonding dye with polymers. Imagine a special ink that, when heated, transforms directly from a solid into a gas, skipping the liquid phase entirely. This gas then permeates the surface of a receptive material, a material rich in polymers. As the item cools, the gas turns back into a solid, now permanently embedded within the material’s surface. The image is not sitting on top of the cup; it has become part of the cup itself.
This scientific reality leads to a practical mandate: a standard ceramic or glass mug from a department store will not work. It lacks the necessary polymer coating. Sublimation blanks are specifically manufactured for this process. They are treated with a special polyester glaze that serves as the receptor for the gaseous dye. Without this coating, the ink has nothing to bond with; the image would simply wipe away or never transfer at all. A professional sublimation coating is applied in industrial settings to ensure a flawless, even surface ready to accept the dye. When you purchase “sublimation mugs,” you are purchasing items that have been prepared for this unique chemical wedding of dye gas to polymer surface. This coating is the secret to the incredible durability of sublimated products. The design becomes impervious to fading, chipping, or peeling, able to withstand dishwashers microwaves without losing its integrity (1nhmugs.com).
Ceramic Mugs: The Classic Choice
When one pictures a customized mug, the image that most often comes to mind is a classic ceramic one. Ceramic holds a place of honor in the world of sublimation for good reasons. It is familiar, weighty in a satisfying way, holds heat well. Its opaque, often white, surface provides a brilliant backdrop for any color or design.
Consider the tactile experience of a ceramic mug. It has a certain earthiness, a connection to traditional pottery that resonates with people. For a business creating promotional items or a person crafting a heartfelt gift, the ceramic mug offers a sense of reliability permanence. The most common size, the 11oz mug, has become an industry standard, meaning that equipment like heat presses are often designed with its dimensions in mind (mecolour.com).
Within the category of ceramic, there are further choices to be made.
- Classic White Mugs: These are the workhorses of the industry. Their pure white surface ensures that the colors of your design are reproduced with the highest possible fidelity. They are the equivalent of a perfectly primed white canvas for a painter.
- Colored Mugs: These mugs come with a colored interior, a colored handle, or even a colored rim. This allows for a wonderful design opportunity, where you can match or contrast your printed design with the inherent color of the mug itself. A black design on a white mug with a black interior can look exceptionally sharp.
- Patch Mugs: These are colored mugs that feature a white, pre-coated patch where the sublimation transfer is to be applied. This gives you the best of both worlds: the visual interest of a colored mug the perfect white background for your image.
- Magic Mugs or Color-Changing Mugs: These are a marvel of material science. At room temperature, they appear as a solid color, usually black. When a hot liquid is poured inside, the heat-sensitive outer layer becomes transparent, revealing the sublimated image beneath. They offer an element of surprise delight, making them exceptional for novelty gifts.
Choosing a high-quality ceramic sublimation mug is paramount. A superior mug will have a consistent, flawlessly applied polymer coating. An inferior one might have microscopic pits or uneven areas in the coating, leading to frustrating imperfections in the final print.
Glass Mugs: A Touch of Elegance
Moving from ceramic to glass is like moving from oil paint to watercolor. Glass offers a different aesthetic, one of translucence elegance. Sublimating on glass presents a unique set of opportunities challenges. Because the material is transparent, the design interacts with the light in a way that is impossible with opaque ceramic.
There are several types of glass mugs suitable for sublimation:
- Clear Glass Mugs: Sublimating on clear glass creates a beautiful, stained-glass effect. The colors will not be opaque but translucent. This means that the color of the beverage inside the mug will become part of the overall visual experience. A design with rich reds might look stunning when the mug is empty, then take on a deeper, more complex tone when filled with dark coffee. One must design with this in mind. Bold, simple designs often work better than those with subtle, light-colored details that might get lost.
- Frosted Glass Mugs: Frosted glass offers a brilliant compromise. The surface is sandblasted or chemically etched to create a semi-opaque, matte finish. This frosted texture catches the light beautifully diffuses it, making the sublimated colors appear more vibrant saturated than on clear glass. The image has a soft, ethereal quality. Frosted glass provides a surface that makes colors pop while still retaining a sense of lightness that is unique to glass.
When thinking about how to customize cups using glass, one must consider the intended use. A clear glass mug with a delicate, translucent design might be perfect for an elegant café or a wedding favor. A frosted glass beer stein with a bold logo could be ideal for a brewery’s merchandise line.
Metal Mugs: Durability Meets Style
Metal sublimation cups bring an entirely different character to the table: ruggedness, modernity, exceptional thermal performance. They are ideal for travel, camping, or for anyone who values durability above all else. The sublimation process works just as effectively on polymer-coated metal as it does on ceramic or glass.
Let’s examine the primary types of metal cups.
- Stainless Steel Cups: These are perhaps the most popular metal option. Often double-walled vacuum-insulated, they can keep drinks hot or cold for hours. Their sleek, modern look appeals to a wide audience. Sublimation on a white-coated stainless steel tumbler or travel mug results in a crisp, vibrant, permanent image. The result is a premium product that is both beautiful functional.
- Aluminum Cups: Aluminum is lighter than stainless steel, which can be an advantage for items like water bottles. Like stainless steel, it must have a polymer coating to be sublimated. The results are similarly vibrant permanent.
- Enamel Mugs: Enamelware evokes a sense of nostalgia, of campfire coffee rustic charm. These mugs are typically made of steel dipped in enamel then fired. For sublimation, they too require a special polymer topcoat. A sublimated design on an enamel mug combines modern printing technology with a vintage aesthetic, creating a product with a unique personality.
The choice of metal often comes down to the intended function. For a corporate gift aimed at commuters, a stainless steel travel mug is a superb choice. For a sporting goods store, branded aluminum water bottles are a natural fit. For a brand cultivating a retro or outdoorsy vibe, enamel mugs are perfect.
Coated vs. Uncoated Surfaces: The Non-Negotiable for Sublimation
It bears repeating, as it is the most common point of failure for beginners. You cannot use any off-the-shelf cup for sublimation. The distinction between a coated uncoated cup is not merely a matter of quality; it is a matter of possibility. An uncoated cup, no matter how beautiful or well-made, lacks the polyester molecules that the sublimation dye needs to bond with. Attempting to sublimate on an uncoated surface is like trying to paint on water.
| Feature | Coated Sublimation Mug | Uncoated Standard Mug |
|---|---|---|
| Surface | Has a special polymer/polyester coating. | Raw ceramic, glass, or metal. No special coating. |
| Sublimation Compatibility | Designed specifically for sublimation. | Not compatible. The ink will not transfer or bond. |
| Image Result | Vibrant, permanent, full-color image. | No image, or a faint, blurry image that can be wiped off. |
| Durability | Image is infused into the coating; dishwasher microwave safe. | N/A, as the image cannot be properly applied. |
| Cost | Slightly higher due to the specialized coating process. | Generally lower cost. |
| Primary Use | Personalized gifts, promotional items, photo mugs. | General beverage consumption. |
A manufacturer with extensive experience, like one that has been in the business for over a decade, understands the nuances of this coating process. A reliable supplier ensures that the coating is applied evenly, is free of defects, is cured correctly to provide the optimal surface for sublimation. For anyone serious about the craft of how to customize cups, sourcing high-quality, properly coated blanks is the first most important investment as noted by industry suppliers.
Choice 2: Designing for Sublimation from Concept to Print
Once you have chosen your canvas—be it sturdy ceramic, elegant glass, or rugged metal—the next phase of your creative journey begins. This is where you breathe life into the inanimate object, where you impart personality, message, art. The design process for sublimation is more than just creating a pretty picture. It is a technical art form that requires an understanding of how colors will transform under heat, how a flat design will wrap around a curved surface, how digital pixels will translate into physical, infused dyes. To master how to customize cups, one must become a translator, fluent in the language of both digital design physical chemistry. Let’s break down this translation process into its core components.
The Principles of Good Mug Design
A mug is not a flat poster. Its curvature, its handle, the way a person holds it—all these factors influence how a design is perceived. A successful mug design works in harmony with the object itself.
- Consider the “Real Estate”: The printable area on a mug is a wide rectangle. A full-wrap design that extends from one side of the handle to the other can be incredibly immersive. Alternatively, a design on just one side (facing out for a right-handed drinker, or facing the drinker) can be more subtle. Some of the most effective designs place one element on the front another on the back, creating a small narrative or a surprise for the user.
- The Wrap-Around Effect: When creating a full-wrap design, remember that the ends of your rectangular image will meet near the handle. Are there patterns or lines that need to align perfectly? This can be tricky. Often, designs that fade to a solid color or have a seamless, repeating pattern near the edges are more forgiving. Think about what the user sees when they first look at the mug. What do they see as they turn it?
- Text Readability: If your design includes text, its size placement are paramount. Text that is too small will be difficult to read. Text that wraps too far into the curve can become distorted. It’s often best to keep key text elements centered on the front or back of the mug.
- The Handle is a No-Go Zone: The standard mug press cannot apply heat pressure evenly right up against the handle. There will always be a small unprintable gap on either side. Your design must account for this. Do not place critical elements in this zone.
- Design for the Medium: A motivational quote on a ceramic mug can be a source of daily encouragement for a colleague (mtceramic.com). A delicate, translucent floral pattern is perfectly suited for a glass mug, while a bold, geometric logo feels right at home on a modern stainless steel tumbler. Let the material you chose in the first step inform your artistic direction.
Software for Your Designs: Professional vs. Beginner-Friendly
The digital tools you use to create your design can range from incredibly powerful professional suites to simple, user-friendly online platforms. The best choice depends on your skill level, budget, your specific needs.
- Professional-Grade Software (The Adobe Suite, CorelDRAW): Programs like Adobe Photoshop, Adobe Illustrator, CorelDRAW are the industry standard for graphic design.
- Photoshop is a raster-based editor, meaning it works with pixels. It is ideal for editing photographs or creating complex, textured artwork. Its color management tools are exceptionally powerful, which is a huge asset for sublimation.
- Illustrator and CorelDRAW are vector-based editors. They work with mathematical equations to create lines shapes. This means vector artwork can be scaled to any size without losing quality. They are perfect for logos, text-based designs, illustrations with clean lines.
- The learning curve for these programs can be steep, they come with a subscription or purchase cost. For a business or a serious hobbyist, the investment is often worthwhile for the level of control they provide.
- Beginner-Friendly Accessible Software (Canva, GIMP, Affinity Designer):
- Canva is a web-based design platform known for its intuitive interface thousands of templates. It’s a fantastic starting point for beginners. You can create beautiful designs quickly without a deep background in graphic design. Be mindful of its color management capabilities, which are less robust than professional software. You may need to export your design then use another tool to ensure it’s in the correct color profile.
- GIMP (GNU Image Manipulation Program) is a free, open-source alternative to Photoshop. It is quite powerful, offering many of the same features as its paid counterpart. It’s a great choice for those on a budget who are willing to navigate its slightly less polished interface.
- Affinity Designer Photo have emerged as serious, one-time-purchase competitors to Adobe’s suite. They offer professional-level features at a more accessible price point, making them an excellent middle ground.
Regardless of the software you choose, the goal is to create a high-resolution file that is properly sized for your mug.
Color Theory for Sublimation: RGB vs. CMYK
This is a topic that often trips up beginners, so let’s approach it with care. Your computer screen creates color by adding light together. It uses the RGB (Red, Green, Blue) color model. When all three are combined at full intensity, they create white light. This is an “additive” color model.
A printer, on the other hand, creates color by subtracting light. It lays down ink on paper. It uses the CMYK (Cyan, Magenta, Yellow, Key/Black) color model. These inks absorb certain wavelengths of light. When you print, you are starting with a white piece of paper (which reflects all light) then adding inks that subtract from it. This is a “subtractive” color model.
Here’s the challenge: the RGB color space can produce some incredibly bright, vibrant colors (like neon greens electric blues) that a CMYK printer simply cannot replicate with ink. Your sublimation printer is a CMYK device.
What does this mean for your design process?
- Design in CMYK if Possible: If your software allows, it’s often best to set up your document in the CMYK color mode from the start. This way, the colors you see on your screen will be a closer approximation of what will actually print. You won’t be surprised when your electric blue design comes out as a more subdued navy blue.
- Use ICC Profiles: The most accurate method for color management is to use ICC (International Color Consortium) profiles. An ICC profile is a small file that acts as a translator. It tells your computer how your specific printer, using your specific ink paper, reproduces color. You typically get this profile from your ink or paper supplier. When you print from a program like Photoshop, you can tell it to use this profile to convert the colors from your screen’s RGB to your printer’s CMYK in the most accurate way possible. This step alone can solve a vast number of color-matching problems.
- The Sublimation Shift: Here’s another layer of complexity. The colors on your printed sublimation paper will look dull faded. This is completely normal. Do not panic! The true, vibrant colors will only emerge when the ink is heated turns into a gas during the pressing process. You must learn to trust the process, not the initial printed sheet.
Preparing Your File: Resolution, Sizing, Mirroring
The final step in the digital phase is preparing your file for the printer. Getting this right is a matter of precision.
- Resolution: Your image should have a resolution of at least 300 DPI (dots per inch) at its final print size. This ensures a sharp, clear image without any pixelation. If you take a small, low-resolution image from the internet try to stretch it to fit a mug, the result will be blurry disappointing. Always start with the highest quality image possible.
- Sizing: You need to measure the printable area of your mug. For a standard 11oz mug, this is typically around 8.5 inches wide by 3.5 inches tall, but you should always measure your specific blanks. Create your design canvas in your software to match these dimensions exactly. Many suppliers provide templates for their products, which is a helpful starting point.
- Mirroring: This is the easiest step to forget the most frustrating mistake to make. When you wrap the printed paper around the mug, the image is flipped. Therefore, you must print a mirror image of your design. If your design includes text, this is especially obvious. The text must be backward on the paper so it will be forward on the final mug. Most sublimation printer drivers have a simple checkbox for “Mirror Image” or “Flip Horizontal.” Always, always double-check that this box is ticked before you hit print. It’s a rite of passage for every sublimation crafter to forget this step at least once produce a mug with backward text. Let’s try to help you avoid that.
By carefully considering the principles of good design, choosing the right software, understanding the nuances of color, meticulously preparing your file, you are setting yourself up for a successful transfer. You have translated your vision into a technically sound, print-ready blueprint.
Choice 3: Mastering the Sublimation Printing and Material Nexus
You have selected your blank chosen your design. Now we arrive at the heart of the physical process: the creation of the transfer itself. This stage is a delicate dance between three key elements: the printer, the ink, the paper. Each component is specialized, designed to work in concert with the others. A mismatch in any one of these can lead to subpar results. Understanding the role of each element is fundamental to learning how to customize cups with consistency quality. Think of it as preparing the ingredients for a complex recipe. The quality of each ingredient will directly impact the final dish.
The Heart of the Operation: Sublimation Printers
You cannot use a standard office or photo inkjet printer for sublimation, at least not without modification. The reason lies in the ink technology. A sublimation printer is essentially an inkjet printer, but it is designed to handle a very specific type of ink.
There are two main routes you can take when choosing a printer:
- Purpose-Built Sublimation Printers: Companies like Sawgrass Virtuoso have long been leaders in this space. They produce printers (like the SG500 or SG1000) that are designed from the ground up for sublimation. They come with their own specialized inks, software (Virtuoso Print Manager), extensive customer support. The advantage of this route is simplicity reliability. Everything is designed to work together as a system. The color management is largely automated, making it easier for beginners to get great results out of the box. The downside is the higher initial cost of both the printer the proprietary ink cartridges.
- Converted Inkjet Printers: A more budget-friendly approach is to convert a standard inkjet printer for sublimation use. The most popular choice for this is the Epson EcoTank line of printers. These printers do not use cartridges; they have refillable ink tanks. This makes it easy to fill them with third-party sublimation ink right from the start. It is absolutely vital that you do this with a brand-new printer. Once regular inkjet ink has been run through a printer’s system, it is nearly impossible to clean it out sufficiently for sublimation. The two ink types will contaminate each other, leading to clogged print heads poor results. The advantage of this method is a significantly lower startup cost. The challenge is that you are on your own for color management. You will need to source high-quality ink from a reputable supplier obtain their specific ICC profile to get accurate colors.
Whichever path you choose, the printer’s job is to lay down a precise, high-resolution layer of solid sublimation dye onto the transfer paper.
The Magic Ingredient: Sublimation Inks
Sublimation ink is a true marvel of chemistry. It is not a typical ink. It consists of microscopic particles of solid dye suspended in a liquid carrier. When printed onto paper, the liquid carrier dries, leaving the solid dye particles behind. The magic happens under heat. At temperatures around 400°F (200°C), these solid particles undergo sublimation—they turn directly into a gas. This dye gas is what penetrates the polymer coating of your mug.
The quality of your sublimation ink is non-negotiable. Low-quality inks can lead to a host of problems:
- Poor Color Vibrancy: They may not produce the rich, saturated colors you expect.
- Clogged Print Heads: The dye particles may be inconsistently sized or formulated, leading to frequent frustrating clogs in your printer. This is a common issue, especially with converted printers.
- Inconsistent Results: Batches of ink may vary in color, leading to prints that don’t match from one day to the next.
- Fading: Lower-quality dyes may not be as UV-stable, meaning the image on the final product could fade over time with exposure to sunlight.
When sourcing ink, especially for a converted Epson printer, it is wise to choose a supplier that specializes in sublimation has a strong reputation. They should be able to provide you with the correct ICC profile for their ink when used with your specific printer model paper. Using the right ink is a cornerstone of achieving high-quality results (mecolour.com).
The Transfer Medium: Sublimation Paper
The third piece of our trinity is the sublimation paper. This is not just any paper. Like the ink, it is specifically engineered for this process. Its job is twofold: first, to accurately hold the printed ink pattern without letting the ink bleed or spread; second, to release as much of that ink as possible in the form of gas during the heat press stage.
A good sublimation paper has a special coating on one side (the printing side). This coating prevents the ink from soaking deep into the paper fibers. Instead, the ink sits right on the surface. This is why you need a high “transfer rate.” A quality paper might release 95% or more of its ink onto the mug. A lower-quality paper might only release 80%, leaving a significant amount of dye behind on the paper the resulting image on the mug will look faded or washed out.
How do you know which side to print on? Often, the printable side is a brighter white than the back. Some brands have a watermark or a colored back to make it obvious. When in doubt, your paper supplier will have instructions. Printing on the wrong side is a common mistake; the paper will absorb the ink like a sponge, the transfer will fail.
Experimenting with different paper brands can be a worthwhile exercise. Some papers may work better with certain inks or for certain applications. For example, some “tacky” papers have a light adhesive that is activated by the heat press, helping to hold the paper perfectly still on the substrate to prevent “ghosting.”
Printing Your Mirrored Design: Best Practices
With your printer, ink, paper chosen, you are ready to print. Let’s walk through a mental checklist for a perfect print every time.
- Check Your Design: Is it mirrored? Is it sized correctly for your mug? Is it 300 DPI?
- Check Your Printer Settings:
- Paper Type: Select a high-quality paper setting, like “Premium Matte” or “Photo Quality Inkjet Paper.” This tells the printer to use more ink lay it down precisely. Do not select a plain paper setting.
- Print Quality: Choose the highest quality setting available.
- Color Management: This is the big one. If you are using a purpose-built system like a Sawgrass, use their print manager. If you are using a converted Epson with ICC profiles, you need to set it up correctly. This usually involves letting your design software (e.g., Photoshop) manage the colors, selecting the correct ICC profile for your ink/paper combo, then turning off all color management in the printer driver itself. This prevents “double profiling,” where both the software the printer try to adjust the colors, resulting in strange color shifts.
- Mirror Image: Is the box ticked? Double-check. Triple-check.
- Load the Paper Correctly: Make sure you are printing on the correct side of the sublimation paper.
- Print Handle with Care: Once printed, the ink is delicate. Avoid touching the printed area with your fingers, as oils from your skin can interfere with the transfer. Let the ink dry completely before applying it to the mug; this can take a few minutes or longer depending on the humidity.
You now hold a piece of paper that looks dull unassuming. Yet, it contains all the potential, all the color, all the information needed to create a vibrant, permanent piece of art. It is the key, ready to unlock the image hidden within the polymer coating of your mug.
Choice 4: The Art of Heat Transfer and Applying Your Design
We have arrived at the final, most dramatic stage of the process. This is the moment of transformation, where heat pressure converge to turn your printed paper transfer into a permanent, vibrant design infused into your cup. This step can feel like alchemy. It is where all your preparation—the choice of blank, the careful design, the precise printing—comes to fruition. Mastering how to customize cups is, in many ways, mastering the delicate balance of three variables: time, temperature, pressure. Getting this trinity right is the key to a flawless final product.
There are two primary methods for applying heat to a mug: the mug press the convection oven. Let’s explore both.
The Mug Press: Your Primary Tool
A mug press is a specialized heat press designed specifically to wrap around a cylindrical mug. It has a curved heating element that makes direct contact with the surface of the cup, ensuring an even distribution of heat pressure. For anyone starting out or focusing primarily on mugs, a quality mug press is an indispensable tool.
What makes a good mug press?
- Even Heating: The heating element should heat consistently across its entire surface. Cheap presses often have “hot spots” “cold spots,” leading to uneven transfers where one part of the design is perfectly sublimated another part is faded.
- Accurate Temperature Control: The digital thermostat should be accurate. A press that reads 400°F but is actually only 370°F will produce underdeveloped images. It’s wise to use an infrared temperature gun to occasionally check the accuracy of your press.
- Consistent Pressure: The clamping mechanism should allow you to apply firm, even pressure. The pressure should be tight enough that you cannot easily rotate the paper on the mug, but not so tight that it risks breaking the ceramic handle.
Mug presses come in various forms. Some have interchangeable heating elements to accommodate different sizes of mugs, from small espresso cups to tall skinny tumblers. This versatility can be a great asset as you expand your product offerings.
The Convection Oven Method: For Batch Production
While a mug press is perfect for making one mug at a time, what if you need to make 20, 50, or 100? This is where a dedicated convection oven comes into play. Note: this must be a dedicated oven. You should never use the same oven for food that you use for sublimation, as the process releases chemical fumes.
The oven method works differently from a press. Instead of conductive heat (direct contact), it uses convective heat (hot circulating air) to heat the mug. To use this method, you need a way to apply pressure. This is achieved using silicone mug wraps. A mug wrap is a thick sheet of silicone with a clasp. You tape your design to the mug, then clamp the silicone wrap tightly around it. The wrap’s job is to provide the necessary firm, even pressure while the mug is “baking” in the oven.
The great advantage of the oven method is scale. You can place multiple wrapped mugs in the oven at once, dramatically increasing your production capacity. This is how many larger businesses that customize cups operate. The challenge is ensuring consistent heating. A good convection oven with a fan is needed to circulate the air prevent hot spots. You may need to experiment with placement rotate the mugs halfway through the process to ensure all sides are heated evenly.
| Method | Best For | Pros | Cons |
|---|---|---|---|
| Mug Press | Beginners, low-to-medium volume, single items. | Easy to use, fast for single mugs, direct heat application. | Can only do one item at a time, limited to specific shapes/sizes per element. |
| Convection Oven | High-volume production, batch orders, irregular shapes. | Can process multiple items at once, can handle items a press can’t. | Requires silicone wraps, potential for uneven heating, dedicated oven needed. |
Step-by-Step Heat Press Application
Let’s walk through the process using a standard mug press. The exact time temperature will vary based on your press, your blanks, your paper/ink combo, but a common starting point for ceramic mugs is around 400°F (200°C) for 180-210 seconds. Always consult the recommendations from your blank supplier.
- Preparation is Key:
- Turn on your mug press set it to the target temperature. Let it preheat completely.
- While it’s heating, prepare your mug. Use a lint-roller to go over the surface of the mug. This removes any tiny specks of dust or lint that could cause a white spot or imperfection in your final print.
- Take your printed, mirrored design. Trim the paper close to the image, leaving a small border.
- Positioning the Transfer:
- Wrap the paper tightly around the mug, ensuring the design is straight level. Look down from the top to check that it is centered between the sides of the handle.
- Secure the paper firmly with pieces of heat-resistant tape. This tape is specially designed to withstand high temperatures without leaving a residue. Do not use regular office tape; it will melt create a mess. Tape the seam where the paper overlaps, also consider taping the top bottom edges to prevent any lifting. The goal is to make sure the paper cannot shift at all during the process as recommended by guides like .
- The Pressing:
- Once the press is at temperature, carefully place the mug inside the heating element.
- Clamp the press shut. The pressure should be firm. A good rule of thumb is that it should require a bit of effort to close, but not a huge amount of force.
- Start the timer.
- The Reveal:
- When the timer goes off, carefully open the press. Be aware that the mug will be extremely hot—over 400°F. Always use heat-resistant gloves.
- Remove the mug from the press place it on a heat-resistant surface, like a ceramic tile or a heat mat.
- With your gloves still on, immediately but carefully peel away the transfer paper. This is the magical moment. You will see the dull image from the paper transformed into a vibrant, glossy design on the mug. Peeling the paper while it’s hot often gives the crispest result.
- Cooling:
- Let the mug cool down completely. This can take 10-15 minutes. Do not try to speed up the process by dunking it in cold water, as the thermal shock could cause the ceramic to crack. As the mug cools, the polymer coating will fully harden, permanently trapping the dye within it.
Achieving Even Pressure with Silicone Wraps
If you are using the oven method, or if you are sublimating a tumbler that doesn’t fit perfectly in your press, a silicone wrap is your best friend. A mug wrap helps distribute heat pressure evenly, which is vital for a good transfer. It conforms to the shape of the cup, smoothing out any minor inconsistencies ensuring the paper is held tightly against the entire surface. When using an oven, the wrap provides the pressure that the press would otherwise supply. For tumblers in a mug press, a wrap can help adapt a slightly tapered tumbler to a straight heating element, filling in any gaps. They are a simple but incredibly effective tool for improving the consistency of your work.
The application of heat is the climax of the sublimation story. It is a process that demands precision patience. But when you master the interplay of time, temperature, pressure, you gain the ability to consistently produce stunning, professional-quality customized cups.
Choice 5: Troubleshooting Common Issues in Cup Customization
Even with the best equipment careful preparation, you will inevitably encounter a print that doesn’t turn out quite right. This is a normal part of the learning process for any craft. Do not be discouraged. A “failed” mug is not a waste; it is a piece of data. It is a clue that can help you refine your technique. By learning to read the signs of a bad print, you can diagnose the problem adjust your variables accordingly. Becoming an expert at how to customize cups means becoming a skilled detective. Let’s look at some of the most common issues their likely culprits.
Faded or “Ghosted” Images: Diagnosing Pressure and Temperature Problems
You pull your mug from the press, the image is disappointingly light, or there’s a faint, blurry shadow next to the main design. These are two distinct but common problems.
- Faded or Washed-Out Images: If the entire image looks underdeveloped, like a pale version of what you expected, the issue is almost always a lack of heat, time, or both.
- Temperature Too Low: Your press may not be reaching the temperature it claims. Verify with an infrared thermometer. If it’s low, you’ll need to increase the set temperature.
- Time Too Short: You may simply not be giving the ink enough time to sublimate fully. Try adding 15-20 seconds to your press time.
- Poor Quality Blanks/Ink/Paper: If your time temperature are correct, the issue could be your materials. A low-quality paper with a poor ink release rate, or a mug with a thin, inconsistent coating, will result in a faded image.
- “Ghosting”: This refers to a faint, shadow-like double image, often appearing alongside sharp lines or text. It’s caused by the sublimation paper shifting slightly as you open the press or as the transfer is happening. When the paper moves, even a millimeter, while the mug is still hot the ink is still in a gaseous state, it can re-deposit itself in a slightly different location.
- Insufficient Pressure: If the pressure is too light, the paper is more likely to move. Ensure your press is clamped firmly.
- Paper Shifting on Opening: Open the press carefully smoothly. Do not let the mechanism spring open abruptly.
- Improper Taping: Use enough heat tape to secure the paper tightly. Ensure it’s taped down at the top bottom edges to prevent any lifting or fluttering. Using a tacky sublimation paper can also help mitigate this issue.
Blurring or Bleeding Colors: The Moisture Menace
You open the press to find that your crisp lines have bled, your colors look fuzzy, or there are splotchy, uneven patches. This is often a sign of one culprit: moisture.
Sublimation is a dry heat process. Any moisture present on the mug, on the paper, or even in the air can turn to steam in the heat press. This steam can interfere with the transfer, causing the dye gas to spread uncontrollably before it sets into the polymer coating.
- Sources of Moisture:
- The Mug: Mugs stored in a humid environment can absorb moisture from the air. The ceramic itself can hold a surprising amount.
- The Paper: Sublimation paper can also absorb ambient humidity.
- Wet Ink: If you don’t let your printed transfer dry completely, the residual liquid carrier in the ink can cause issues.
- The Solution: Preheat! An easy effective way to combat moisture is to pre-press your mug. Before you tape your design on, place the blank mug in your press for about 10-15 seconds. This will warm it up drive off any surface moisture. You can also place your printed paper under the open heat press for a few seconds (don’t close it) to dry it out. Some professionals even store their paper in a sealed container with desiccant packs.
Another cause of blurring can be excessive time or temperature. If you “overcook” the mug, the dye can begin to spread out within the polymer coating, leading to a loss of sharpness. It’s a fine balance.
Uneven Color Distribution: The Pressure Puzzle
You find that your design is perfect on one side of the mug but faded on the other, or there are light spots in the middle of a solid block of color. This is almost always a pressure problem. The sublimation process requires firm, even contact between the paper the entire surface of the mug. Any area where the contact is weak will not receive enough heat or pressure for a proper transfer.
- Uneven Press Pressure: Your mug press may not be applying pressure evenly. This is more common in lower-quality presses. Check that the heating element is properly aligned that the clamp is functioning correctly.
- Mug Shape: Not all mugs are perfectly cylindrical. Some may have a slight taper or a subtle bulge. If your press is perfectly straight, it may not make full contact with an imperfectly shaped mug. This is a case where using a silicone wrap inside your press can help, as it can conform to slight irregularities.
- Tapered Mugs in a Straight Press: If you are trying to press a tapered latte mug in a straight-walled press, you will inevitably have pressure issues. You need a conical heating element designed for tapered mugs.
- Obstructions: A tiny speck of debris on the mug or a wrinkle in the transfer paper can create a gap, resulting in a small, unprinted white spot. This is why cleaning the mug with a lint roller is a valuable step.
By systematically working through these variables—time, temperature, pressure, moisture—you can move from being a frustrated operator to a skilled technician. Each failed print is a lesson, guiding you toward the perfect combination that yields consistently beautiful results. For those looking to scale, partnering with an experienced manufacturer that offers OEM and ODM services can provide access to years of refined processes quality control, minimizing these issues from the start.
Beyond Mugs: Expanding Your Sublimation Horizons
While the classic coffee mug is the quintessential sublimation product, it is only the beginning. The same fundamental principles—a polymer-coated substrate, sublimation ink, heat, pressure—can be applied to a vast array of other items. Once you have honed your skills learning how to customize cups, you can apply that knowledge to build a diverse product line for a hobby or a business. The world of sublimation consumables is wide rich with possibility. Many manufacturers offer a whole ecosystem of products beyond drinkware. Let’s explore some of these exciting avenues.
Customizing Plates, Tiles, and Photo Frames
Flat items open up a new world of decorative functional possibilities. The process is very similar, but instead of a mug press, you will need a flat heat press.
- Sublimation Plates: These are ceramic plates with a polymer coating, usually on the face of the plate. They are typically intended for decorative use rather than for eating off of, as cutlery could scratch the coating. They make for beautiful display pieces, commemorative awards, or personalized gifts. You can print family photos, intricate patterns, or custom text. The challenge is ensuring the plate can withstand the heat pressure of the press. Always use plates specifically sold for sublimation.
- Ceramic Tiles: Sublimated ceramic tiles are a fantastic product. They can be used individually as decorative art pieces, trivets, or coasters. They can also be combined to create stunning, custom photo murals for a kitchen backsplash or a bathroom wall. Imagine a shower tiled not with plain white squares, but with a single, massive, high-resolution image of a serene landscape. The possibilities are limited only by your imagination your flat press size.
- Glass Photo Frames: These are elegant, modern items. A sheet of specially coated glass is sublimated on the back side. The image is then viewed through the thickness of the glass, which gives it a wonderful sense of depth vibrancy. They make for premium-feeling personalized gifts are a great way to display cherished memories.
- Rock Slates: These are one of the most unique sublimation substrates. They are pieces of natural slate, cut into various shapes sizes, with a white polymer coating on one face. The sublimation process yields a vibrant image, but the natural, chiseled edges of the rock remain visible. This contrast between the high-tech photo the rustic, earthy material creates a stunning visual effect. They are very popular as photo displays memorials.
Exploring OEM and ODM Services for Business Growth
As your interest or business in cup customization grows, you may move from crafting individual items to thinking about larger-scale production, unique product development, or branding. This is where partnering with a manufacturer offering OEM ODM services becomes a powerful strategy.
- OEM (Original Equipment Manufacturer): In an OEM arrangement, you provide the design, the factory produces the product to your specifications. For example, you could have your own line of branded mug designs that you sell online. You would send the artwork files to an experienced manufacturer, like a factory with a decade of experience, they would handle the entire production process: printing the transfers, sublimating the mugs, quality control, even custom packaging. This allows you to scale your business without investing in a large production facility of your own. You can focus on design marketing while the factory handles the manufacturing.
- ODM (Original Design Manufacturer): An ODM relationship goes a step further. The manufacturer not only produces the items but also contributes to the design development process. Perhaps you have an idea for a new type of travel mug with a unique lid, but you don’t have the engineering expertise to design it. You could work with an ODM partner who has their own R&D department. They can help you turn your concept into a manufacturable product, create prototypes, then handle mass production. This is a collaborative partnership that can lead to truly innovative products.
For entrepreneurs in the USA, Russia, or Europe, partnering with a factory that has an integrated trade company can streamline the process of importing. They can handle the complexities of international logistics, ensuring your products arrive safely efficiently. This kind of partnership allows a small business to leverage the scale, experience, technology of a large manufacturer, leveling the playing field competing effectively in the global market.
By looking beyond the mug, you can see that learning how to customize cups is not just about a single craft; it is about mastering a versatile technology that can be applied to a huge range of products. Whether you are creating a single photo tile for your home or launching a full product line through an OEM partner, the fundamental skills you develop are the key to unlocking a world of creative commercial potential.
Frequently Asked Questions (FAQ)
Can I use a regular mug for sublimation?
No, you cannot use a regular, off-the-shelf mug. Sublimation requires a special polyester or polymer coating that a standard mug lacks. The sublimation ink, when heated, turns into a gas that needs this polymer coating to bond with. Without it, the image will not transfer correctly or will simply wipe off.
Why does my printed transfer paper look so dull and faded?
This is completely normal and expected. Sublimation ink appears dull when first printed on paper. The true, vibrant colors are only revealed during the heat press process when the solid dyes turn into a gas and infuse into the cup’s polymer coating. You must trust the process and not judge the quality by the initial paper print.
What are the most important settings on my heat press?
The three most important variables are temperature, time, and pressure. For a standard 11oz ceramic mug, a common starting point is a temperature of around 400°F (200°C), a time of 180-210 seconds, and firm pressure. However, these settings can vary based on your specific press, mugs, ink, and paper, so always refer to your supplier’s recommendations and be prepared to do some testing.
Why is my image blurry or splotchy?
Blurring or splotchiness is most often caused by moisture. Any moisture on the mug or paper can turn to steam during pressing and interfere with the transfer. To prevent this, always pre-press your blank mug for 10-15 seconds to drive off any moisture before taping your design to it.
Do I really need to mirror my image before printing?
Yes, absolutely. You must print a mirror image of your design onto the sublimation paper. When you wrap the paper around the mug and press it, the image is reversed. If you print the design normally, any text or asymmetrical elements will appear backward on the final product. Most printer drivers have a simple “mirror image” checkbox for this purpose.
Are sublimated mugs dishwasher and microwave safe?
Yes, one of the greatest advantages of sublimation is its durability. Because the dye is infused into the coating of the mug rather than sitting on the surface, a high-quality sublimated mug is completely dishwasher and microwave safe. The image will not peel, crack, or fade with normal use (1nhmugs.com).
What is the difference between OEM and ODM services?
OEM (Original Equipment Manufacturer) is when a factory produces a product based on your existing design. ODM (Original Design Manufacturer) is a more collaborative process where the factory also helps you design and develop the product from your concept. Both are excellent options for scaling a customization business.
Conclusion
The journey of learning how to customize cups is a rewarding exploration that blends artistry with science. It begins with the thoughtful selection of a polymer-coated blank—be it the classic ceramic, the elegant glass, or the durable metal—understanding that this foundation dictates the final outcome. The process flows into the creative realm of digital design, where concepts are translated into print-ready files with careful attention to color profiles, resolution, and the critical step of mirroring the image. The heart of the physical transformation lies in the nexus of a specialized printer, vibrant sublimation inks, and high-release paper, all working in concert to produce the transfer.
The climax of this process, the application of heat and pressure, is where preparation meets performance. Mastering the delicate balance of time, temperature, and pressure in a mug press or convection oven is what separates the novice from the artisan. It is in this fiery embrace that a simple printed sheet transforms into a permanent, brilliant design, infused into the very being of the cup. As we have seen, this knowledge is not confined to mugs alone; it is a gateway to a wider world of customizable products, from decorative plates to unique rock slates. For those with entrepreneurial ambitions, understanding these fundamentals opens the door to scaling a business through strategic partnerships with experienced manufacturers, leveraging their expertise in production and global trade. Ultimately, cup customization is more than a technique; it is a powerful medium for personal expression, gift-giving, and commerce, limited only by one’s creativity and dedication to the craft.
References
Mecolour. (2023, May 6). 10 common problems and 17 tips in mug sublimation printing. Mecolour. https://www.mecolour.com/10-common-problems-and-17-tips-in-mug-sublimation-printing/
Mecolour. (2023, September 19). How to choose the best coffee mugs for sublimation? Mecolour. https://www.mecolour.com/best-coffee-mugs-for-sublimation/
MT Ceramic. (2024, November 19). Top ceramic mug styles & designs trending in 2025. https://mtceramic.com/top-ceramic-mug-styles-2025/
Nelson. (2024, November 19). Dye sublimation. NH Mugs.
Print on Demand Cast. (2023, February 27). Sublimation printing on ceramic mugs: The basics.
Robotic Paint. (2021, March 13). Sublimation coating on ceramic guide. https://roboticpaint.com/sublimation-coating-on-ceramic-guide/
TopSub. (2025, July 23). What are the differences between coated and uncoated ceramic mugs?https://www.topsub.cn/what-are-the-differences-between-coated-and-uncoated-ceramic-mugs/